Are you excited to begin your knitwear design journey? This guide shows you each step, from your first idea to the last stitch. Careful planning and correct measurements help your project succeed. Look at why these parts are important:
Component | Importance |
|---|---|
Gives you clear pictures of your garment. | |
Garment Measurement Specs | Helps your fit stay the same and easy to check. |
Construction and Stitch Details | Tells you how to make your piece strong and good quality. |
You can try different styles, materials, and fits. The cropped knitwear design guide wants you to test new ideas and make every project special.
Key Takeaways
Begin your knitwear design by picking a project you like and that fits your skills. Get ideas from places like fashion magazines, Pinterest, and books to help you think of new designs. Make clear goals for your project. Think about your skills and how much time you have so you can stay on track. Good measurements are very important for a nice fit. Always check your numbers twice before you start. Draw sketches to see your design. Try both hand-drawn and digital tools to see what you like best. Choose the right yarn and tools to make your cropped knitwear comfy and strong. Make a swatch with your yarn to check the gauge. This helps your finished piece fit right and is a key step. Add your own touch with decorations, changes to the fit, and special textures to make your knitwear unique.
Cropped Knitwear Design Guide: Project Selection
Choosing your first project is a big step in the cropped knitwear design guide. You want something that excites you and matches your skills. Let’s break down how you can find inspiration and set goals for your knitwear project.
Inspiration Sources
You can find ideas almost anywhere. The cropped knitwear design guide encourages you to look at different places for fresh styles and shapes.
Style Trends
Fashion changes fast. You might see cropped sweaters in magazines or on social media. VK is a well-known fashion magazine that works with top designers and releases new trends every season. Pinterest is another great spot. You can search for images of cropped sweaters and get suggestions for similar looks. Books also help. Sometimes, a story or a picture sparks a new idea for your next knitwear project.
Source | Description |
|---|---|
VK | A prominent fashion magazine that collaborates with top designers, published quarterly. |
Offers a way to gather diverse imagery and suggests similar images based on user preferences. |
Tip: Save your favorite images in a folder or on a board. This makes it easy to compare styles and pick what you like.
Garment Types
You have many choices in the cropped knitwear design guide. Some of the most popular projects for beginners and intermediate knitters include:
Crop tops: These are easy to make. You knit a single rectangle and use basic stitches like knits and purls. Twisted straps and ribbed designs look modern and trendy.
Cropped sweaters: These work well for styling cropped sweaters with jeans or skirts.
Cropped cardigans: You can layer these over dresses or shirts for a fresh look.
Setting Goals
Before you start, think about what you want to achieve. The cropped knitwear design guide helps you set goals that fit your skills and schedule.
Skill Level
Pick a knitwear project that matches your experience. If you are new, try a simple crop top. If you know more stitches, you can try styling cropped sweaters with cables or lace. Using leftover yarn is a smart way to practice and save money.
Timeframe
Set a time limit for your project. You might want to finish a cropped sweater before school starts or make a cardigan as a gift. Write down your plan and keep track of your progress. This helps you stay focused and organized.
Note: Setting realistic goals, like using yarn you already have, makes your project easier to finish.
The cropped knitwear design guide wants you to enjoy the process. Pick a project that excites you, gather inspiration, and set goals that help you succeed.
Step-by-Step Guide: Planning and Sketching
You have picked your project and gathered inspiration. Now, you need a step-by-step guide to help you plan and sketch your cropped knitwear. This part is where your ideas start to take shape. You will measure, sketch, and draft your pattern. Each step by step action helps you avoid mistakes and makes your project easier to finish.
Taking Measurements
Getting the right fit starts with essential measurements. You want your cropped sweater or cardigan to look and feel just right. Use a soft measuring tape and write down each number as you go.
Bust, Waist, Length
Here is a table to help you with each measurement:
Measurement Type | Description |
|---|---|
Bust | Measure around the fullest part of your chest. Keep the tape snug but not tight. |
Natural waistline | Find the smallest part of your midsection. This is where your hands rest when you bend sideways. |
Hips | Wrap the tape around the widest part of your hips, just below the hip bones. |
Shoulder width | Measure from one shoulder tip to the other across your back. |
Neck width | Start where your neck meets your shoulder and measure to the other side. |
Back waist | Go from the bump at the top of your spine down to your natural waist. |
Arm length | Begin at the center of your back, over your shoulder, and down to your wrist bone. |
Desired length | Measure from the top of your shoulder to where you want the hem to sit. |
Tip: Double-check your numbers. Write them down in a notebook or on your phone. This step-by-step guide helps you avoid sizing problems later.
Fit Preferences
Think about how you want your cropped knitwear to fit. Do you like a loose, boxy look? Maybe you want something more fitted. Write down your fit preferences before you start sketching. This helps you make custom patterns that match your style.
Common mistakes to avoid:
Ignoring the gauge can make your sweater too big or too small.
Skipping the swatch step leads to surprises and wasted time.
Not measuring correctly causes fit issues.
A gauge swatch is a small sample you knit before starting your main project. It checks if your stitches per inch match the pattern. If your swatch is off, your finished piece might not fit.
Sketching Your Design
Now, you get to see your ideas come to life. Sketching helps you visualize your cropped knitwear before you start knitting. This step-by-step guide makes it easy to turn your thoughts into a real plan.
Diagrams
Start with simple diagrams. Use a pencil and paper to draw the front, back, and sleeves. Mark where you want ribbing, cables, or color changes. Pattern-making rulers help you keep lines straight and shapes even.
Digital Tools
If you like working on a computer, try digital tools. Programs like Adobe Illustrator let you draw clean lines and add colors. You can save your sketches and make changes as you go. Digital sketches make it easy to share your ideas or print them out for reference.
Tool/Method | Description |
|---|---|
Stainless Steel Ruler | Measures and checks stretch in your knit fabric. |
Pattern-Making Rulers | Helps you draw straight lines and curves for your design. |
Muslin Fabric | Lets you drape and test your design on a dress form. |
Digital Tools | Programs like Adobe Illustrator help you create and edit your sketches. |
Magnifying Glass | Checks stitch details and placement for accuracy. |
Try both hand-drawn and digital sketches. See which one feels best for you.
Drafting the Pattern
You have your measurements and your sketch. Now, you need to draft your pattern. This step-by-step guide walks you through making custom patterns that fit your body and style.
Stitch and Row Counts
Count how many stitches and rows you need for each part of your sweater. Use your gauge swatch to figure out how many stitches fit in one inch. Multiply by your measurements to get the right size. Write down these numbers for the front, back, and sleeves.
Shaping Instructions
Add shaping to your pattern. Decide where you want to increase or decrease stitches for the bust, waist, or sleeves. Write clear instructions for each step by step change. This helps you keep track as you knit.
A well-drafted pattern includes:
Pattern notes that explain your inspiration and how to build the sweater.
Materials and info like skill level, sizing, yarn, needles, and gauge.
Pattern instructions with clear headings.
A list of abbreviations and what they mean.
Graphics and diagrams for easy reference.
A short note about you as the designer.
Keep your pattern organized. This makes it easier to follow and share with others.
Why Planning Matters
When you follow a step-by-step guide, you save time and avoid frustration. You get a sweater that fits and looks the way you want. Planning and sketching help you make custom patterns that show off your creativity. Take your time with each step by step action. Your finished cropped knitwear will be worth it!
Cropped Sweater: Materials and Tools
Choosing the right materials and tools makes your cropped sweater project much more enjoyable. You want your finished piece to feel great, look stylish, and last a long time. Let’s break down what you need to know before you start knitting.
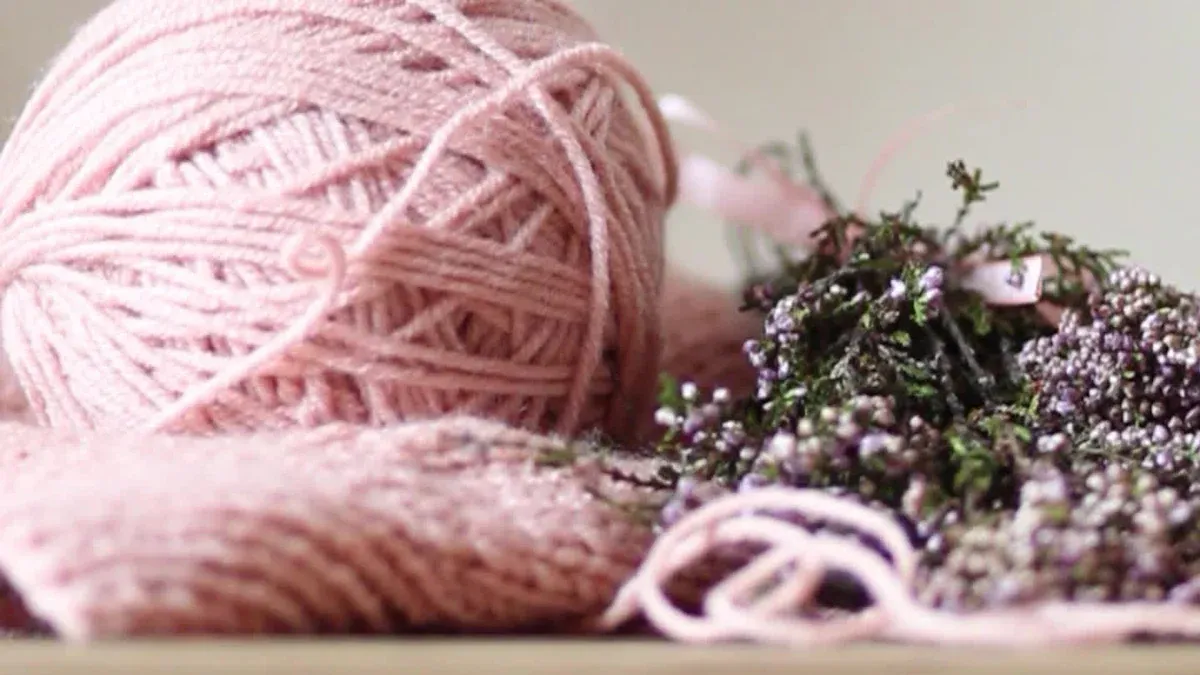
Yarn Selection
Picking yarn is one of the most exciting steps. The yarn you choose affects how your cropped sweater feels, fits, and looks.
Fiber Types
Different fibers give your cropped sweater unique qualities. Here’s a quick guide to help you compare:
Yarn Type | Durability | Comfort | Appearance |
|---|---|---|---|
Merino | High | Hypoallergenic, retains shape | Suitable for all projects |
Alpaca | High | Soft, hypoallergenic | Luxurious sheen |
Cotton | High | Light, breathable | Versatile, available in various thicknesses |
Linen | High | Strong, cool, breathable | Elegant, suitable for summer |
Mohair | High | Soft, breathable, excellent insulator | Shiny, luxurious appearance |
If you want a cropped sweater that feels soft and cozy, try merino or alpaca. For a summer cropped sweater, linen or cotton works well. Mohair adds a shiny, fluffy look.
Yarn Weight
Yarn weight changes how your cropped sweater drapes and fits. Thicker yarns make a chunkier, warmer cropped sweater. Lighter yarns create a softer, flowy look. Yarn weight also affects your gauge, which is the number of stitches and rows in a certain space. Always knit a gauge swatch before starting. This helps you get the right size and shape.
Yarn weight affects the gauge, which is crucial for achieving the desired size and fit in garments.
Different yarn weights create varying levels of structure and drape, impacting how the garment fits and falls on the body.
Using the correct yarn weight ensures that the finished piece drapes beautifully and flatters the wearer.
Tip: Make a small swatch with your chosen yarn and needles. Check if it matches the pattern’s gauge. This step saves you from surprises later.
Color Choices
Color brings your cropped sweater to life. You can go bold or keep it classic.
Color Theory
Want your cropped sweater to stand out? Try these ideas:
Change one color at a time for smooth gradients.
Embrace vibrant shades like electric blue or sunny yellow.
Layer a bold cropped sweater over simple outfits for extra style.
Try contrasting colors, like purple with dark mustard, for a dramatic effect.
Take a black-and-white photo of your yarns to check if the colors pop against each other.
Swatching
Always test your colors before you start your cropped sweater. Knit a small swatch with your chosen colors. This helps you see how they look together and if the yarns bleed or fade. Swatching also lets you check the feel and drape of your fabric.
Essential Tools
Having the right tools makes knitting your cropped sweater easier and more fun.
Needles & Accessories
You need good needles for your cropped sweater. Circular needles work well for most projects. Stitch markers help you keep track of pattern changes. Measuring tape lets you check your progress. Tapestry needles help you weave in ends when you finish.
Scrap yarn holds stitches without the bulk of stitch holders.
Crochet hooks fix dropped stitches and make bobbles.
Gauge finders and needle sizers help you pick the right needle size.
Hand cream and emery boards keep your hands smooth so yarn doesn’t snag.
Stitch markers and progress keepers track your rows and stitches.
Tapestry needles and measuring tape are must-haves for finishing touches.
Advanced Tools
If you want to take your cropped sweater to the next level, try advanced tools. Digital row counters help you track your progress. Blocking mats and pins shape your finished sweater. A magnifying glass helps you check stitch details. These tools make your project look polished and professional.
Remember: The right materials and tools help you create a cropped sweater you’ll love to wear and show off!
Steps: Swatching and Preparation
Getting ready for your cropped knitwear project means following a few important steps. You want your sweater cropping to look great and fit well. Let’s walk through how you can make a swatch, read your pattern, and set up your workspace.
Making a Swatch
Swatching is one of the first steps before you start knitting. You use the yarn and needle size from your pattern. Make a swatch that is at least 6-8 inches square. This helps you check your gauge and see how the yarn behaves. Wash or block your swatch just like you will with your finished piece. If you plan to use different stitch patterns, make a swatch for each one.
Use the final yarn and needle size specified in your pattern for swatching.
Create a swatch that is at least 6-8 inches square for accurate gauge measurement.
Wash or block the swatch as you would the final piece to understand yarn behavior.
Make multiple swatches if using different stitch patterns.
Swatching ensures accurate sizing and fit, helps you thoughtfully select your yarn and needles, allows you to experiment, gives insights into yarn behavior, and minimizes trial and error in the design process.
Gauge Testing
Gauge testing is key for sweater cropping. You count how many stitches and rows fit in one inch. This number helps you figure out how many stitches you need for your project. Accurate gauge testing helps you get the right size. If your gauge is off, your sweater might be too tight or too loose.
Accurate gauge testing helps determine the number of stitches and rows needed for the desired dimensions of the garment.
Adjusting stitch counts based on gauge ensures the final garment fits correctly, preventing it from being too tight or too loose.
The formula for gauge directly relates to the finished size: number of stitches per inch multiplied by the desired inches equals total stitches required.
Adjusting Needles
If your swatch does not match the pattern’s gauge, change your needle size. Try a bigger needle if your stitches are too tight. Use a smaller needle if your stitches are too loose. Keep testing until your swatch matches the pattern.
Pattern Reading
Reading your pattern is one of the most important steps. You want to understand every instruction before you start knitting.
Modifying for Cropped Length
When you change a pattern for sweater cropping, use your own measurements. If you want a relaxed fit, adjust the sleeve depth and overall length. Use your upper torso measurement plus ease to get the right chest size. Accurate measurements help you avoid mistakes and wasted yarn.
Every mistake you make while adjusting a pattern helps you learn. You discover what fits you best and what style you like. Swatching is an essential step that many knitters skip, but it helps you understand your gauge and make changes before you start the whole project.
Understanding Instructions
Take time to read each part of your pattern. Look for special stitches or shaping. Write notes if you need to. This helps you stay organized and avoid confusion.
Workspace Setup
A good workspace makes knitting easier and more fun. You want everything you need close by.
Organizing Materials
Follow these steps to organize your supplies:
Sort your materials into sections, one area at a time.
Decide if you want to keep or repurpose old projects.
Throw away broken items and donate yarn you do not use.
Pick storage containers that fit your sorted materials.
Label your bins so you can find things quickly.
You can use wall shelves or baskets to keep supplies handy. Set up a “Knitting Station” with your current project and tools nearby. Use pegboards or hanging organizers to save space.
Comfort Tips
Pick a chair that supports your back. Make sure you have good light. Keep snacks and water close. Take breaks to stretch your hands and shoulders. A comfy workspace helps you enjoy every step of your sweater cropping project.
Step-by-Step Guide: Knitting and Assembly
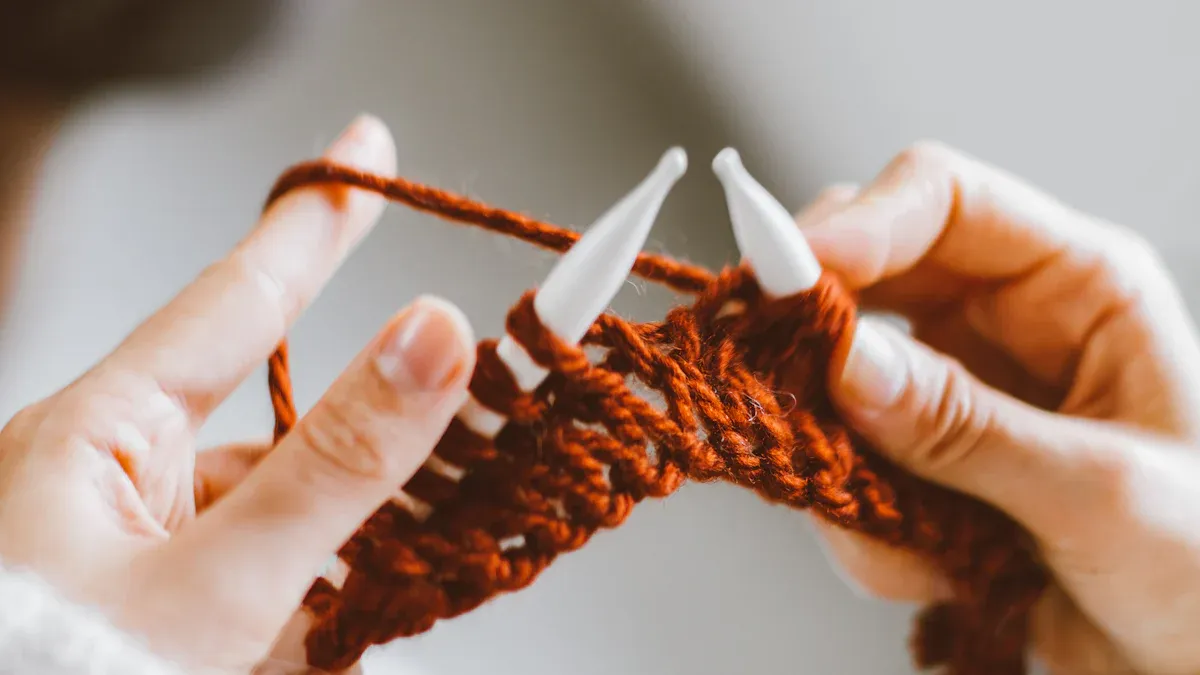
You’ve planned your design, picked your yarn, and made your swatch. Now, you’re ready to knit and put your cropped knitwear together. This part is where your project really comes to life. Let’s walk through each step by step process so you can follow clear knitting instructions and finish with a professional look.
Knitting Pieces
You’ll start by knitting each part of your cropped sweater. Most designs have a front, back, and sleeves. You can knit these pieces one at a time or work on sections together.
Front, Back, Sleeves
Here’s a step by step list to help you keep track:
Cast on the stitches for the back piece. Knit until you reach the desired length, following your pattern for shaping.
Repeat for the front piece. Make sure your measurements match so the pieces fit together.
Knit the sleeves. You can make them short or long, depending on your style. Use stitch markers to help with increases or decreases.
Double-check your stitch and row counts. Lay out your pieces and compare them to your sketches.
Tip: Use a notebook to record your progress. This helps you spot mistakes early and keeps your step by step work organized.
Sectional Work
Some knitters like to work in sections. You might knit the body in one piece and add sleeves later. Sectional work can make shaping easier and help you see your progress.
Try knitting the body up to the armholes, then split for the front and back.
Work sleeves separately and attach them during assembly.
Use scrap yarn to hold stitches if you need to pause and check your fit.
Shaping & Detailing
Shaping gives your cropped knitwear a custom fit. Details like ribbing and decorative stitches add style and personality.
Ribbing & Edges
Ribbing helps your sweater hold its shape at the edges. You can use simple knit and purl patterns or try something fancy.
Add ribbing to the hem, cuffs, and neckline.
Use a smaller needle for ribbing to make it snug.
Try twisted rib or double rib for a unique look.
Note: Ribbing not only looks good, but it also keeps your edges from curling.
Decorative Elements
You can add special touches to your cropped knitwear. Here’s a table with shaping and detailing techniques:
Technique | Description |
|---|---|
Wrapped Stitch/Short Row | Use this method to avoid gaps in your knitting when turning mid-row. |
Increases/Decreases | Combine left-leaning and right-leaning decreases for symmetry; use stitch markers for precision. |
Short Rows | Work partial rows to build extra fabric where needed, such as in bust darts or sock heels. |
Measurement | Start with precise measurements to ensure a perfect fit, considering bust, waist, and length. |
Planning | Use tools like a tape measure and reference sheets to guide your shaping process. |
You can use short rows for shoulder shaping or bust darts. Mix increases and decreases for a fitted waist. Add cables, lace, or colorwork for extra flair.
Short rows help shape shoulders and bust.
Increases and decreases create curves and fit.
Decorative stitches make your sweater stand out.
Garment Assembly
Once you finish knitting all the pieces, it’s time to put everything together. Assembly is a step by step process that makes your cropped knitwear strong and neat.
Seaming
Seams give your sweater structure and help it keep its shape. They prevent stretching and biasing, so your garment lasts longer.
Here’s a step by step guide for seaming and assembly:
Weave in all ends from your knitted pieces.
Steam block each piece to flatten them out.
Align the right sides of the pieces to be joined.
Use the mattress stitch to join the first sleeve to the back, working from neck down to armpit.
Join the second sleeve to the back.
Attach the front piece to each sleeve.
Stitch up the sides from the bottom edge to the armpit.
Pick up stitches and knit the neckline or any finishing details.
Weave in ends from the mattress stitch seams.
Wet block the finished sweater in a water bath.
Always block your pieces before seaming. This makes them tidy and even. Use a blunt-ended, large-eyed needle for seaming, and pick yarn that matches your project. Pin basting helps hold seams in place while you sew.
Work with right sides facing.
Use the horizontal bar beside the edge stitch for seaming.
For ribbing, find the bar between knit and purl stitches for a secure seam.
Blocking
Blocking is the final step by step action before you wear your cropped knitwear. It helps set the shape and smooth out stitches.
Steam block each piece before assembly.
Wet block the finished sweater after seaming. Soak it in cool water, gently squeeze out excess, and lay flat to dry.
Use blocking mats and pins to shape your garment.
Blocking makes your sweater look polished and professional. Don’t skip this step!
You’ve followed each step by step process, from knitting instructions to assembly. Now, you can enjoy your custom cropped knitwear and show off your skills!
Custom Knitwear: Personalization Steps
You can make custom knitwear truly your own by adding special touches. Personalization lets you show off your style and creativity. You get to choose how your cropped sweater looks and feels. Let’s explore some fun ways to add customization to your project.
Embellishments
Decorating your custom knitwear is a great way to make it stand out. You can use embroidery, beading, buttons, or appliqué. Each method gives your cropped sweater a unique look.
Embroidery & Beading
Embroidery brings color and texture to custom knitwear. You can stitch flowers, geometric shapes, or abstract designs. Try lazy daisy flowers or French knots for a playful touch. Duplicate stitch works well for adding seamless motifs. Many knitters use chain stitch and cross stitch to create patterns inspired by vintage styles or famous textile artists.
Beading adds sparkle and dimension. You can sew beads along the neckline or cuffs. Mix beads with embroidery for a bold effect. You decide how much shine you want.
Tip: Practice embroidery stitches on a swatch before you add them to your cropped sweater. This helps you get the look you want.
Buttons & Appliqué
Buttons are both useful and decorative. You can choose colorful buttons or classic ones. Place them on the front, cuffs, or even as accents on the shoulders. Appliqué lets you sew fabric shapes onto your custom knitwear. Try hearts, stars, or letters for a playful design.
Embellishment Type | How to Use It | Style Ideas |
|---|---|---|
Buttons | Sew onto cuffs or front | Mix colors or shapes |
Appliqué | Stitch fabric shapes on top | Use felt, denim, or velvet |
Beading | Add beads to edges or motifs | Create patterns or borders |
You can mix and match these embellishments for even more customization.
Fit Adjustments
Custom knitwear designs give you control over the fit. You can change the length, sleeves, or neckline to match your style. Customizing cropped sweaters means you get a piece that feels just right.
Length Variations
You decide how short or long you want your cropped sweater. Measure from your shoulder to the spot where you want the hem. You can make a super short crop or a longer style that sits at your waist. Changing the length is easy. Just knit more or fewer rows.
Sleeve & Neckline Mods
You can adjust sleeve length by counting the stitches needed for the cuff. Add a couple of inches to your wrist measurement for comfort. Use patterns you already like as a guide for sleeve styles and lengths. You can make sleeves short, long, or even add a puff at the shoulder.
Necklines are fun to customize. Try a crew neck, V-neck, or boat neck. You can make the neckline wider or narrower. Add ribbing or a rolled edge for a different look.
Adjust sleeve length by calculating the stitch count for the cuff.
Add ease to the cuff size for comfort.
Use favorite patterns as a reference for sleeve and neckline styles.
Note: Always check your measurements before you start. This helps you avoid fit problems and makes your custom knitwear more comfortable.
Texture & Pattern
Texture and pattern make custom knitwear designs exciting. You can use cables, lace, or colorwork to add interest and style. Customization lets you mix these techniques for a one-of-a-kind look.
Cables & Lace
Cables create raised lines and twists in your cropped sweater. You can place cables down the front, sleeves, or sides. Try different cable styles for a bold or subtle effect.
Lace adds a delicate touch. You can knit lace panels or borders. Lace makes your custom knitwear light and airy. Many knitters combine lace with cables for a unique look.
Cables: Place them in eye-catching spots for style.
Lace: Use delicate patterns to add lightness and femininity.
Colorwork
Colorwork lets you use more than one color in your custom knitwear. You can knit stripes, blocks, or even pictures. Colorwork looks great with cables and lace. Try bold colors for a modern style or soft shades for a classic look.
Mix colors to make your cropped sweater pop.
Add colorwork to sleeves, hems, or yokes.
Combine colorwork with other textures for extra customization.
Callout: Swatch your colorwork before you start. This helps you see how the colors look together and if the yarns work well.
Customizing cropped sweaters is all about making choices. You get to pick the embellishments, fit, texture, and pattern. Custom knitwear gives you endless options for creativity. Every detail you add makes your project special. Enjoy the process and show off your custom knitwear designs with pride!
Troubleshooting & Finishing Steps
Fixing Mistakes
Everyone makes mistakes while knitting, even experienced crafters. The good news? You can fix most problems with a little patience and the right tools.
Dropped Stitches
Dropped stitches happen when a loop slips off your needle. This mistake leaves a ladder or gap in your fabric. Don’t panic! You can fix it with a crochet hook or even your knitting needle. Just pick up the dropped stitch and pull it through each loop above until you reach your current row.
Tip: Use stitch stoppers or check your stitches often to catch drops early. Try not to stop in the middle of a row.
Here’s a quick table of common mistakes and how you can fix or avoid them:
Mistake | How it Happens | How to Fix | How to Avoid |
|---|---|---|---|
Dropped Stitches | Stitch slips off the needle | Use a crochet hook to pick it up | Use stitch stoppers, check as you go |
Knitting in the Wrong Direction | Start knitting the wrong way | Unpick and knit in the right direction | Use a marker for the last stitch |
Stitches Crossing Over Other Stitches | Pulling loops incorrectly | Unravel and pick up with a crochet hook | Good lighting, check stitches |
Casting On or Binding Off Too Tight | Edges are too tight | Redo the edge | Keep stitches loose, try new methods |
Gripping Too Tight | Holding needles too tightly | Relax and take breaks | Work in a comfy space |
Finished Project Doesn’t Match Expectations | Project looks different than planned | Take a break or reclaim yarn | Swatch first, share progress |
Sizing Errors
Sometimes your sweater turns out too big or too small. This usually happens if your gauge is off or you missed a measurement. If you notice early, you can unravel a few rows and adjust your stitch count. If you finish and it still doesn’t fit, try blocking to stretch or shrink the fabric a bit. For big mistakes, you might need to start over, but every project teaches you something new.
Adjusting On-the-Fly
You might spot a problem while you knit. Don’t worry—you can make changes as you go.
Modifications
Want to add a design or fix a mistake? Anchor your yarn ends by weaving them into the fabric. This keeps your changes secure and stretchy. If you add embroidery, use a magnetic hoop to keep your fabric flat. Place designs away from high-stretch areas unless you use small, flexible motifs.
Reworking
If you need to undo a section, gently pull out the stitches until you reach the mistake. Pick up the live stitches with your needle and start again. Take your time and check your work often. You’ll get better with practice!
Finishing Touches
The last steps make your cropped knitwear look polished and last longer.
Weaving Ends
Use a tapestry needle to weave yarn tails into the seams or along the edges. This keeps your sweater neat and stops it from unraveling. Always weave in at least two inches of yarn for security.
Final Blocking
Blocking shapes your sweater and smooths out stitches. Soak your finished piece in cool water, squeeze out extra water, and lay it flat on a towel. Pin it to the right shape and let it dry. Blocking makes your knitwear look professional and helps it keep its shape.
Careful edge finishing, seamless construction, and blocking all help your sweater look great and last longer. Take your time with these steps—you’ll be glad you did! 🧶
Care & Storage
Taking care of your cropped knitwear helps it last longer and keeps it looking fresh. You put a lot of work into your project, so you want to keep it in great shape. Let’s talk about how you can wash and store your hand-knit pieces the right way.
Washing Tips
You don’t need to wash your cropped sweater after every wear. Wool and other natural fibers can stay fresh with just a little care. Here’s how you can keep your knitwear clean and soft:
Hand Wash Only: Always wash your knits by hand. Use cold or lukewarm water and a gentle detergent. Avoid scrubbing or twisting the fabric.
Spot-Cleaning: If you spill something, blot the spot right away. Wool resists stains, so quick action works best.
Freshen Between Wears: Air out your sweater after wearing it. Hang it over a chair or lay it flat for a few hours. This helps remove odors and keeps the fabric fresh.
De-Pilling: Pills are those little fuzz balls that show up after wearing. Use a sweater stone or a soft brush to gently remove them.
Steaming: If your sweater gets wrinkled, use steam to relax the fabric. Hold a steamer or iron (on the steam setting) above the knit—don’t press down.
Dry Flat: After washing, lay your sweater flat on a towel to dry. Never hang it up, or it might stretch out of shape.
Tip: Wash your hand-knit sweaters only a few times each season. Too much washing can wear out the fibers.
Long-Term Care
Storing your cropped knitwear the right way keeps it safe from damage and helps it keep its shape. Here’s what you can do:
Smart Storage: Store your sweaters in breathable fabric bags or ventilated boxes. Avoid airtight plastic bins, because natural fibers need to breathe.
Rotate Your Knits: Don’t wear the same sweater every day. Give each piece time to air out between wears.
Natural Repellents: Place lavender sachets or cedar blocks in your storage area. These keep moths and bugs away without harsh chemicals.
Lay Flat, Don’t Hang: Always fold your sweaters and lay them flat. Hanging can stretch out the shoulders and ruin the shape.
Air Out Regularly: Every few weeks, take your sweaters out and let them breathe. This keeps them fresh and prevents musty smells.
Here’s a quick table to help you remember:
Do This | Avoid This |
|---|---|
Hand wash in cold water | Machine washing |
Lay flat to dry | Hanging to dry |
Store in fabric bags | Storing in plastic |
Use natural repellents | Using mothballs |
Remember: A little care goes a long way. Your cropped knitwear will stay beautiful and cozy for years if you treat it gently.
You’ve learned every step to design your own cropped knitwear. Now, it’s your turn to grab your yarn and start creating. Celebrate each stitch and enjoy the journey.
Try new styles and techniques.
Reflect on what you learned.
Show off your finished piece with pride.
Got questions or want to share your design? Drop a comment below. I’d love to see what you make!
FAQ
How do I choose the best yarn for cropped knitwear?
Pick yarn based on season and comfort. Soft merino works for winter. Cotton feels cool in summer. Always check the yarn label for care instructions. Swatch before you start to see how the yarn behaves.
What if my sweater turns out too short?
Don’t worry! You can add extra rows or a ribbed hem. If you’ve finished, try layering your cropped sweater over longer tops. Next time, measure from your shoulder to your desired hem before knitting.
Can I knit cropped sweaters without a pattern?
Yes, you can! Sketch your idea and use your measurements. Start with basic shapes like rectangles. Adjust as you go. Many knitters enjoy freestyle projects. You learn a lot by experimenting.
How do I fix a dropped stitch?
Use a crochet hook to pick up the dropped stitch. Pull it through each loop above until you reach your current row. Check your work often to catch mistakes early. Practice makes this easier!
What’s the easiest way to add color to my design?
Try stripes or color blocks. Use leftover yarn for fun accents. Knit a small swatch to test your color combo. You can also add embroidery or appliqué after finishing your sweater.
How do I keep my cropped knitwear from stretching out?
Lay your sweater flat to dry after washing. Store it folded in a fabric bag. Avoid hanging it up. Use ribbing at the edges for extra structure. Natural fibers like wool hold their shape better.
Can beginners make cropped cardigans?
Absolutely! Start with simple patterns and basic stitches. Use chunky yarn for faster results. Follow step-by-step instructions. Ask for help in online knitting groups if you get stuck. You’ll improve with every project.
Do I need special tools for custom knitwear?
You don’t need fancy tools. Basic needles, measuring tape, and stitch markers work well. If you want to try advanced techniques, digital row counters and blocking mats help. Most knitters start with simple supplies.