A pre-production sample, often referred to as PPS, is a crucial step in knitwear production. If you’re asking what is the PPS (pre-production sample) in knitwear, it’s the first actual example of your design made before mass production begins. The PPS allows you to review the garment’s fit, construction, and overall quality. By examining the PPS, you can identify and correct any mistakes early, which helps prevent major issues in larger orders. This process ensures that both you and the manufacturer agree on every detail before moving forward. The table below highlights how evaluating the PPS (pre-production sample) in knitwear helps reduce defects in bulk production.
Step | Purpose | Impact on Defects |
|---|---|---|
Pre-Production Sample Evaluation | Check garment for construction, fit, and design accuracy | Finds possible mistakes early, so there are fewer defects later |
So, if you’re wondering what is the PPS (pre-production sample) in knitwear, it’s the key step that helps guarantee your final product meets expectations.
Key Takeaways
A pre-production sample (PPS) is the first real piece of your knitwear design. It is used to check the fit, quality, and how it is made before making many pieces. Checking the PPS helps find mistakes early. This saves time and money by stopping problems in big orders. The PPS is not the same as fit samples or prototypes. It uses the final materials and is the example for making many pieces. Always look at the PPS for fit, fabric quality, color, and how well it is made. This helps make sure the clothes are good quality. Talking well with manufacturers is important. Share clear ideas and give feedback often to stop confusion. Make sure to set timelines that make sense for the PPS process. This gives time for changes and stops rushing, which can cause mistakes. Write down all feedback and changes during the PPS process. This helps keep track and make better samples later. Learning from each PPS change helps you get better. It also helps make your knitwear better over time.
What Is the PPS (Pre-Production Sample) in Knitwear?
PPS Definition and Purpose
If you ask what the PPS is in knitwear, you want a simple answer. In knitwear, a pre-production sample is a test version made before making many pieces. You use this sample to check the design, fabric, and how it is made. This step helps you find problems early and fix them. You do this before making lots of clothes. The pre-production process has planning, making the sample, and getting approvals. These steps help make sure your final product is what you want.
You make a pre-production sample for a few big reasons:
You check if the design looks and works as you want.
You make sure all parts and quality are right.
You fix mistakes before making many pieces, which saves time and money.
If you want to know what the PPS is in knitwear, remember it is your chance to check every detail before making a big order.
PPS vs. Prototype and Fit Sample
You may wonder how a pre-production sample is not the same as other samples. If you ask what the PPS is in knitwear, you should know how it is different from a prototype or fit sample. The table below shows the main differences:
Sample Type | Purpose | Process |
|---|---|---|
Fit Sample | Focus on fit, shape, and size; helps fix measurements | Made from fabric that is close to the real one |
Pre-Production Sample | Used as the main sample for bulk orders | Made after all changes, with real fabric and trims |
Prototype Sample | Shows style and design ideas; made early | Made early to try out new design ideas |
A fit sample helps you check the shape and size of your clothing. You use fabric that is close to the real one, but not always the final fabric. A prototype sample lets you see the style and design early. You use it to try out ideas. The pre-production sample is the last version before making many pieces. You use the real fabric and trims. This sample is what the factory uses when making your order.
Key Features of PPS
If you ask what the PPS is in knitwear, you should know its main features. The production sample is special because it uses the same fabric and trims as the big order. You usually make it in the middle or main size. This sample lets you check the fit, color, and design before making many pieces. Your factory uses this sample as a guide. After you say yes, the factory checks all clothes to match this sample.
Feature/Use | Description |
|---|---|
Fabric & Trims | Must be the same as used in the big order. |
Size | Made in the middle or main size. |
Purpose | Lets the buyer check fit, color, and design before making many pieces. |
Factory Reference | The factory uses this sample to make and check all clothes after you approve it. |
Tip: Always look at your production sample very carefully. This step helps you avoid big mistakes and makes sure your final product is what you want.
If you want to understand what the PPS is in knitwear, remember it is the last check before making many pieces. You use it to make sure every detail is right, from fabric to fit, so your clothes turn out the way you want.
Why PPS Matters in Knitwear Manufacturing
Ensuring Design Consistency
You want all sweaters to look and feel the same. The pre-production sample helps set a clear standard. When you approve this sample, it becomes the example for the factory. Workers use it to match every detail, like color and fit. This step helps you find problems early. It saves time and money. Buyers trust you more when your sweaters are high quality.
Here is a table that shows how the pre-production sample helps keep sweaters consistent:
Benefit | Description |
|---|---|
Acts as a benchmark | The approved sample is the standard for all sweaters. |
Early detection of issues | You find design or fit problems before making many sweaters. |
Ensures quality and consistency | All sweaters stay the same during production. |
Saves time and cost | You avoid delays and extra costs when making many sweaters. |
Builds buyer confidence | Good quality makes your brand stronger. |
Quality Control Before Bulk Production
You need to check every part before making lots of sweaters. The pre-production process lets you test real materials and colors. You can see if the fabric feels right and if the stitching is strong. You also do tests like shrinkage, colorfastness, and strength. These checks help you find weak spots in the process. You make sure the sample meets your quality rules.
Here are some important checks to do with the production sample:
Stitching and seams: Check for even stitches and strong seams.
Fabric quality: Make sure the fabric feels good and has no problems.
Fit and sizing: Check that the sweater fits and matches the size chart.
Color consistency: Colors should look the same with no fading.
Finishing details: Look at hems, buttons, zippers, and labels.
Shrinkage tests: Wash the sweater to see if it shrinks too much.
Colorfastness tests: See if the color stays after washing or sweating.
Tensile strength tests: Check how much force the fabric can take.
Seam slippage tests: Make sure seams stay strong when pulled.
Pilling test: Look for small fabric balls after use.
These tests help you make sure every sweater is high quality.
Buyer and Manufacturer Alignment
You want everyone to agree before making many sweaters. The pre-production sample helps you and the factory understand each other. You use it to check every detail. This step helps stop confusion. Both sides know what to expect from the sample.
The sampling process helps share ideas between design and making sweaters.
Pre-production samples help everyone understand and check designs. They make sure the final sweaters match what buyers want.
You send the sample to the buyer, get feedback, and make changes if needed. This process makes sure everyone is happy with the plan. You lower risks and make better sweaters by agreeing before making many.
PP samples help buyers and factories understand each other.
They check designs before making many sweaters.
Sending and approving samples is important for everyone to agree.
You use the pre-production sample to check costs, materials, and if making the sweater is possible. This step helps you find problems with price or timing. You build trust and make fewer mistakes in the process.
PPS Process in Knitwear Production
Sample Garment Creation
You begin by making a sample of your design. This helps you see your ideas in real life. You follow steps to make sure the sample matches your plan.
Tech Pack and Design Handover
First, you make a tech pack. It has drawings, sizes, and instructions for your garment. You give this pack to the factory team. They use it to learn what you want. You also share any changes or comments from the buyer. This step helps everyone know the details before making the sample.
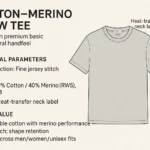
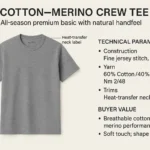
Material and Yarn Selection
Next, you pick the yarn and trims for your sample. You make sure these are the same as what you want for big orders. You check the yarn for strength and color. You choose buttons, labels, and zippers that fit your design. This step helps you avoid problems later.
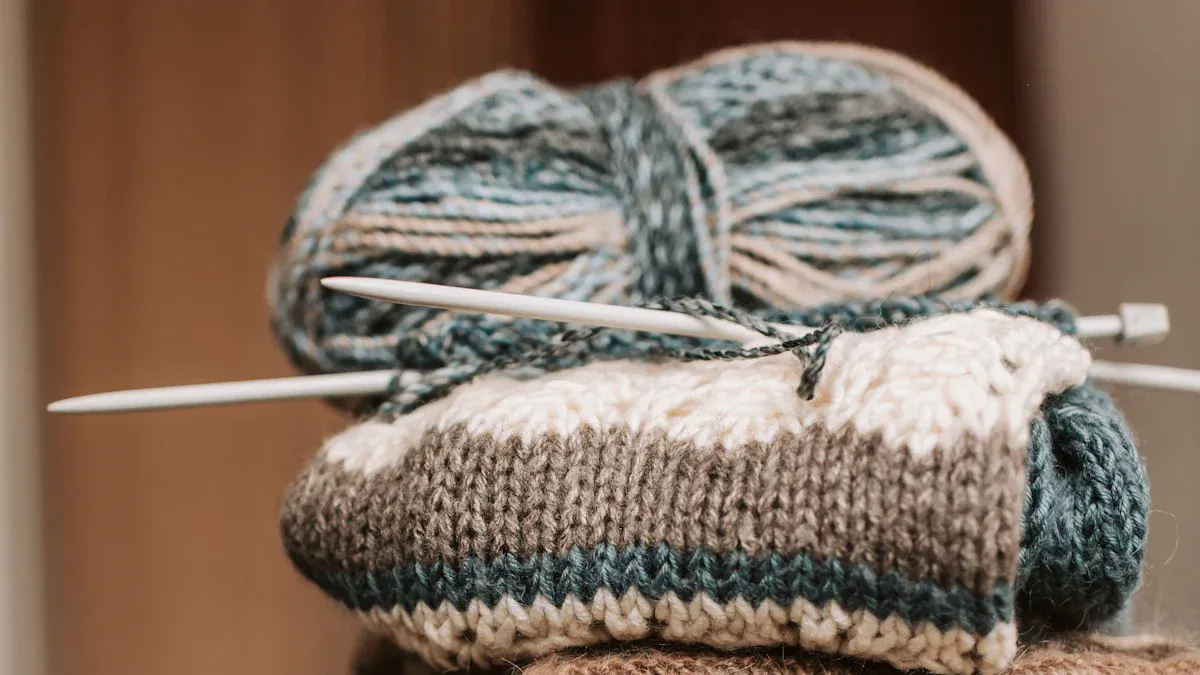
Knitting and Assembly
You give the tech pack and materials to the sample room. The team knits the garment with the right tension and pattern. They follow your instructions for stitching and how to put it together. The sample room works with the pattern and CAD team to get the shape right. Quality control checks if the work is neat and correct. You get a sample that looks and feels like your final product.
Here is a table that shows best ways to make a sample during pre-production:
Category | Details |
|---|---|
Approved Tech Pack, final fabric & trims, size set approval, buyer comments, clear construction specs | |
Teams Involved in Making a PP Sample | Merchandising Team, Sample Room, Pattern & CAD Department, Quality Control, Production Planning Team |
PP Sample Checklist | Fabric: Buyer-approved quality, Trims: Correct labels/buttons/zippers, Construction: Accurate stitching, Measurements: Matches size specs, Workmanship: Clean finish |
Measurement and Quality Analysis
You check the sample to see if the size is right. You measure every part and compare it to your chart. You look for mistakes in size or shape. You test the yarn to see how it works. You check the knitting tension. You make sure the color is correct. You look at the stitching and how strong the fibers are. These steps help you find problems before making many pieces. You want your sample to meet your quality rules.
Watch the knitting tension
Make sure the size is right
Match colors to approved samples
Check if stitching is strong
Test how the fibers work
You do these checks for every sample. This helps you keep quality high and avoid mistakes.
Client Review and Feedback
You send the sample to the client to check. The client looks at old comments and sees if you made things better. They compare materials to approved samples and buyer comments. They look at how well it is made and if it is safe. They measure every part to see if it matches the rules. They test the fit on a dress form and look for problems. The client gives feedback and asks for changes if needed. You use this feedback to make your sample better.
Tip: Always listen to what the client says. This helps you make a garment that fits their needs and keeps your quality high.
You follow these steps for every sample. You use these steps to make sure your garment is ready for big orders. You check every detail and fix problems early. This helps you give a high-quality product every time.
Pre-Production Sample Evaluation
Fit and Measurement Checks
You have to check the fit and size of each pre-production sample. This step helps you find mistakes before making many pieces. Your garment should match your design and size chart. Here are some steps for a good quality check:
Measure the garment early in the process. This helps you talk about any problems and fix them.
Use your specs sheet to find Points of Measure. These are spots where you check the size.
Give your team a How to Measure Guide. This helps everyone measure the same way.
Test the fit and comfort with fit models or workers. Make sure the garment lets people move easily.
Tip: Always check the sample against your measurement chart. This keeps sizes right and stops expensive mistakes.
Material and Color Verification
You need to check the material and color before making many pieces. This step makes sure your garment looks and feels correct. Use a quality check to find problems early. The table below shows what to look for:
Description | |
|---|---|
Color differences and shifting | Look for color changes between the sample and your plan. |
Rub tests | Rub with white cotton to see if color comes off. |
Fabric defects checking | Find any fabric flaws that could hurt quality. |
Stains, moulds, odor and insects | Make sure the fabric is clean and has no bad smells or bugs. |
Packaging, logos, labels and markings | Check that branding and packaging are what you want. |
Special requirements & on-site testing | Do extra tests if your client asks for them. |
Note: Always do these checks before you say yes to the pre-production sample. This helps you stop problems before making many pieces.
Construction and Workmanship Review
You need to check how the garment is made. This step helps you spot problems with how it is built and designed. A good quality check covers these things:
Look at the garment for construction, fit, design, color, and size.
Watch for problems like wrong knitting tension, bad measurements, color mistakes, and design errors.
Check if the yarn stretches or shrinks after knitting.
Use the same yarn and machine settings as you will use for big orders. This keeps your sample close to the real product.
Tip: Always look closely at how well the garment is made. Good work means better quality and fewer returns.
You should use these steps for every pre-production sample. Careful checks help you make garments that meet your rules and make buyers happy.
Common Issues and Solutions
When you check pre-production samples in knitwear, you may find problems. These problems can change how your final product turns out. If you know about these issues, you can fix them early. This helps you save time and money before making many pieces.
Here are some problems you might see when checking samples:
Fabric and trim differences
Fit and size not matching
Delays in making samples
Poor communication
Different ways of checking samples
You can look at the table below to see these problems and how to fix them:
Common Issues | Recommended Solutions |
|---|---|
Fabric and Trim Variations | Early sampling approvals |
Inconsistencies in Fit and Sizing | Clear documentation |
Production Delays | Third-party quality control inspections |
Lack of Proper Communication | Regular updates and meetings |
Variation in inspection standards | Standardized checklists and training |
Fabric and Trim Variations
Sometimes, the fabric or trims in your sample are not what you wanted. This can happen if the supplier uses different materials. To fix this, ask for early approvals on all materials. Check and approve everything before the factory starts your sample.
Inconsistencies in Fit and Sizing
Your sample might not fit right or have wrong measurements. You can fix this by keeping clear records. Use a measurement chart and share it with your team. Make sure everyone knows how to measure each part.
Production Delays
Delays can happen if your sample is not right or if materials are late. You can stop delays by using third-party inspectors. They help you find mistakes early and keep your work on time.
Lack of Proper Communication
If you do not talk often with your team or factory, mistakes can happen. Set up regular meetings and updates. This helps everyone know what is happening and fix problems fast.
Variation in Inspection Standards
Different people may check samples in different ways. This can cause confusion and missed mistakes. Fix this by using checklists and training. Teach your team to check samples the same way every time.
Tip: Always use a checklist when you review samples. This helps you find problems and make sure your product is good.
You can stop many problems by staying organized and working with your team. If you find a problem, fix it quickly. Good communication and clear rules help you make great knitwear every time.
Tips for Optimizing the PPS Process
Clear Communication with Manufacturers
Good communication helps the pre-production sample process go well. Start by telling your manufacturer what you need and when you need it. Share your expectations so there is no confusion. Talk to your manufacturer often. Regular updates help stop small problems from getting bigger. Give honest feedback so they know what you want. Learn about what your manufacturer does best. This helps you work together better. If you can, visit the factory. Seeing how things are made builds trust. It shows you care about quality. Treat your manufacturer like a partner. Respect helps everyone work together. Think about working together for a long time, not just for now. Solve problems as a team. Working together helps you find answers faster.
Here is a table with ways to work better together:
Strategy | Description |
|---|---|
Lay it All Out | Be clear about needs, timelines, and expectations from the start. |
Keep in Touch | Maintain regular communication to prevent issues from escalating. |
Feedback Flow | Provide honest feedback to ensure smooth progress. |
Get to Know Them | Understand the manufacturer’s strengths for better teamwork. |
Visit If You Can | Visiting the facility builds trust and shows commitment. |
Mutual Respect | Treat manufacturers as integral partners to foster collaboration. |
Think Ahead | Look for long-term partnerships rather than short-term gains. |
Grow Together | Collaborate on growth and evolution as brands expand. |
Problem-Solving Partner | Approach problems collaboratively to find solutions together. |
Tip: Setting clear rules and talking often helps you avoid mistakes in the pre-production sample process.
Setting Realistic Timelines
You need to set timelines that match the work needed for pre-production samples. If you rush, you might make mistakes or miss details. Plan each step and give enough time for every part. Making a sample usually takes two to four weeks. If you need special fabric, knitting can take up to 60 days. The time can change depending on the country or factory. Sometimes, you have to buy a lot of fabric if you cannot get just a little. Always ask your manufacturer how long each step will take.
Here is a simple list of timeline steps:
Change the fit
Finish the fabric (2–4 weeks)
Stage | Duration |
|---|---|
Fabric sourcing | Varies |
Sample development | 2–4 weeks |
Fabric knitting (if needed) | ~60 days |
Note: Give yourself extra time for delays you did not expect. Careful planning helps you stay calm and keeps your project moving.
Documenting Feedback and Revisions
You should keep track of every change and comment during the pre-production sample process. Write down feedback after each review. Tell your supplier you want unlimited changes if the sample is not right. Do not pay extra unless you change the design or what you want. Set clear time limits for each change. This helps you move forward and get the sample you want.
Here is a table to help you keep track of changes:
Key Points | Description |
|---|---|
The supplier must produce an unlimited number of sample revisions if previous samples do not meet specifications. | |
No Additional Payments | The seller cannot request extra payments unless the buyer changes product designs or requirements. |
Revision Time Limits | Specific time frames for each sample revision should be established to ensure timely feedback and production. |
Tip: Use a checklist or log to keep track of every change. This helps you stay organized and makes sure you do not miss anything.
You can make your pre-production sample process better by following these tips. Good communication, smart timelines, and careful records help you avoid mistakes and make high-quality knitwear.
Learning from PPS Adjustments
You can learn something new from every PPS change. Each time you change a sample, you get better at making knitwear. When you look back at what worked and what did not, you get ready for the next project.
Start by writing down every change you make to your samples. Write what you changed, why you did it, and what happened after. This helps you see patterns and stop making the same mistakes. For example, if you keep having size problems, you may need to fix your size charts or give clearer notes to the factory.
Tip: Make a simple table or checklist for each change. This helps you look back and talk with your team.
Adjustment Made | Reason for Change | Result After Change | Lesson Learned |
|---|---|---|---|
Changed sleeve length | Fit was too short | Better arm movement | Double-check sleeve specs |
Switched yarn type | Yarn pilled after wash | Improved durability | Test yarns before selection |
Updated label design | Label caused irritation | More comfortable wear | Use softer label materials |
You should talk with your team after every PPS round. Ask what went well and what needs to be better. Let everyone share their ideas. Talking openly helps you fix problems faster and helps everyone learn.
When buyers or clients give feedback, listen closely. Their words tell you what is most important to them. Use their ideas to help you plan your next steps. If a buyer says the color is wrong, check your color approval steps for next time.
Here are some ways to learn from PPS changes:
Look at all feedback after each sample.
Update your tech packs and size charts with what you learn.
Share what you learn with your team so mistakes do not happen again.
Make a checklist of common problems to watch for next time.
Celebrate even small wins to keep your team happy.
Note: Every PPS change is a chance to get better. The more you learn, the better your knitwear will be.
By learning from every PPS change, you make your work easier and your products better. You save time, spend less money, and buyers trust you more. Keep learning, and your knitwear business will get stronger with every order.
Glossary of PPS Terms in Knitwear
Pre-Production Sample (PPS)
You will see the term pre-production sample often in knitwear manufacturing. This is the first real example of your garment made before you start bulk production. You use this sample to check if the design, fit, and construction meet your standards. The pre-production sample acts as a reference for both you and the factory. When you approve it, you set the standard for all future pieces. This step helps you catch mistakes early and keep quality high.
Tech Pack
A tech pack is a set of documents that tells the factory how to make your garment. You use it to share every detail about your design. The tech pack helps everyone understand what you want before the pre-production process begins. Here are the main parts of a tech pack:
Fashion flat sketches show your design from different angles. These sketches help the factory see what the finished garment should look like.
The Bill of Materials (BOM) lists all the raw materials you need. This includes yarn, trims, and labels. The BOM is important for sourcing and quality.
Garment measurement specs give the exact measurements for each part of your garment. These specs help the factory make pieces that fit right.
A garment cost sheet shows the total cost to make your garment. It includes material and labor costs.
You should always check your tech pack before you start the pre-production sample. A clear tech pack helps you avoid confusion and mistakes.
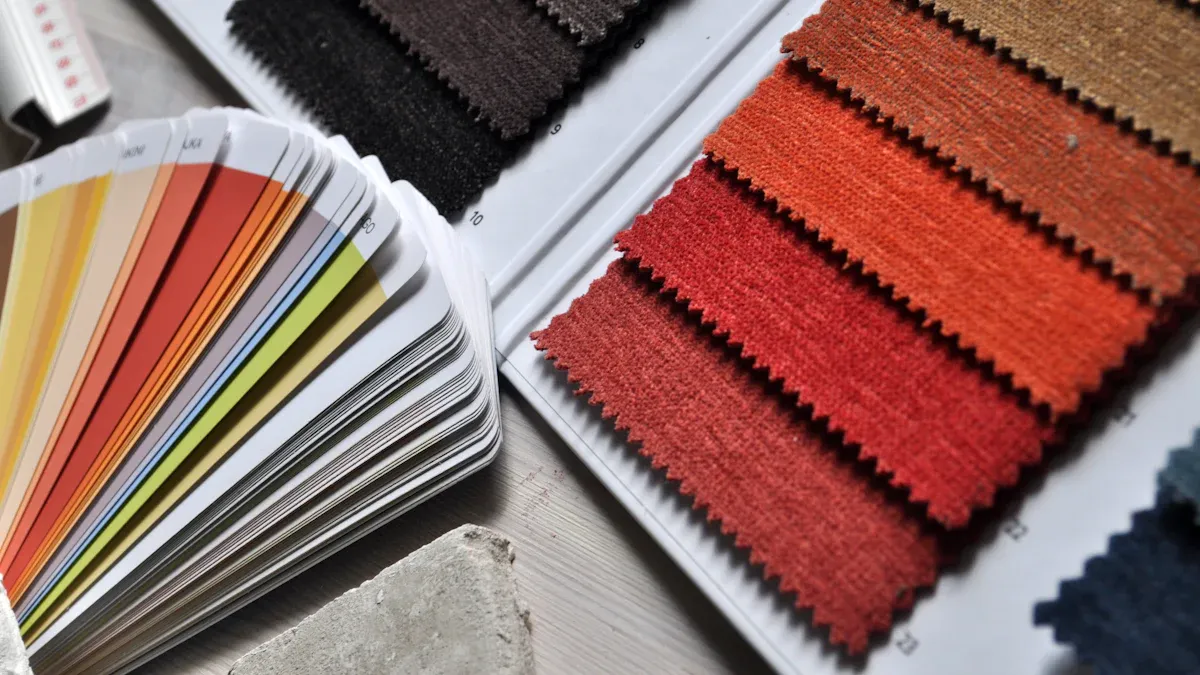
Lab Dip
A lab dip is a small piece of fabric dyed to match a specific color. You use lab dips to make sure the color of your garment matches your design. The lab dip process starts with setting a color standard. The factory then dyes small fabric samples and sends them to you for approval. You check if the color matches what you want. If it does, you approve the lab dip. The factory will not start making the full order until you approve the lab dip.
The lab dip process lets you see how the dye looks on the fabric.
You can compare different samples to find the best color match.
Lab dips help you control color quality and keep your garments looking the way you planned.
Note: Always approve the lab dip before you move to bulk production. This step helps you avoid color problems in your final product.
Bulk Production
Bulk production means making many identical garments at the same time. In knitwear manufacturing, you use assembly-line methods and machines to create large numbers of products. This process helps you lower the cost for each piece. After you approve the pre-production sample, the factory uses it as a guide for all the garments in your order. Bulk production starts only when you feel sure about the design, fit, and quality. This step is important because it lets you make enough products to meet your customers’ needs. If you skip careful checks before bulk production, you might face big problems later. Always remember, the goal is to make every garment look and feel the same.
Tip: Never start bulk production until you approve the pre-production sample. This helps you avoid costly mistakes.
Fit Sample
A fit sample is a special garment you use to check how your design fits on a real person or model. You make this sample before you start making many pieces. The fit sample helps you see if the size matches what your brand wants for its customers. You look at how the garment sits on the body, if it feels comfortable, and if it moves well. This step lets you find and fix problems with the design or size. You can change the pattern or measurements if you see issues. The fit sample plays a big part in making sure your final product meets your quality standards. When you get the fit right, you help your customers feel good in your clothes.
Note: Always test your fit sample on someone who matches your target customer. This gives you the best results.
Measurement Chart
A measurement chart is a tool you use to check the size and shape of your garment. You measure the sample and compare it to the original pattern. This helps you find spots that are too tight or too loose. You write down what you find, so you can adjust the pattern if needed. The measurement chart works with your tech pack as a blueprint for production. It guides the factory in making your design and helps them figure out how much fabric to use and what the costs will be.
Use the measurement chart to check the sample against your pattern.
Find and fix fit issues before you make many garments.
Document your findings to help with future adjustments.
Give the chart to the factory so they can follow your design closely.
Tip: Always keep your measurement chart up to date. This helps you make garments that fit well and keep your quality high.
Quality Control
Quality control helps you make sure every knitwear piece meets your standards before you start mass production. In the pre-production stage, you check many details to avoid mistakes later. You want your garment to look good, feel comfortable, and last a long time.
You can follow these important steps for quality control:
Fabric Inspection: Look at every roll of fabric. Check for holes, stains, or colors that do not match. If you find a problem, you can fix it before making the garment.
Trims and Accessories Check: Test all zippers, buttons, and labels. Make sure they work well and look right. If a zipper breaks or a button falls off, you need to know before you make many pieces.
Pattern and Sample Approval: Compare the sample to your design. Make sure the pattern matches what you planned. If the sample is wrong, you can change it now.
You also need to choose good suppliers. Reliable suppliers help you get the same quality every time. When you pick the right supplier, you lower the risk of problems with your garment.
Here is a simple checklist you can use for quality control in knitwear:
Pick a trusted supplier.
Inspect all fabric for defects.
Check trims and accessories for strength and size.
Test a sample garment for fit and comfort.
Approve the pattern to match your design.
Tip: Always check your sample carefully during pre-production. This step helps you catch mistakes early and saves you time and money.
Quality control is not just about finding mistakes. It helps you build trust with your buyers. When you follow these steps, you make sure every garment meets your standards and keeps your customers happy.
You are important in making sure knitwear is good quality. When you know the PPS process, you help your team work better. Many factories made more clothes each day and worked faster. They saved over one minute on each cycle. Line efficiency went up to over 81%. Try using the tips and glossary in your own work. If you want to know more, read guides or ask knitwear experts.
Factories made 700 more pieces each day
Cycle time went down from 22.15 to 14.34 seconds
Line efficiency was 81.20%
Keep learning and use these steps to get better at making knitwear.
FAQ
What is a pre-production sample in knitwear?
A pre-production sample is the first real version of your knitwear design. You use it to check fit, color, and quality before starting bulk production.
Why do you need a PPS before bulk production?
You need a PPS to catch mistakes early. This step helps you avoid costly errors and ensures your final product matches your expectations.
How does a PPS differ from a fit sample?
A fit sample checks size and comfort. A PPS uses final materials and trims. You use the PPS as the standard for all bulk production.
Who approves the pre-production sample?
You, the buyer or brand owner, approve the PPS. The factory waits for your approval before making many pieces.
What should you check in a PPS?
Always check these points:
Fit and measurements
Fabric and color
Stitching and trims
Overall workmanship
How long does it take to make a PPS?
Making a PPS usually takes two to four weeks. Special yarns or trims may add more time.
Can you request changes after seeing the PPS?
Yes, you can ask for changes. You should give clear feedback so the factory can fix any issues before bulk production.
What happens if the PPS does not meet your standards?
You should not approve the PPS. Ask for corrections. The factory must make a new sample until it matches your requirements.