When you start sewing, the way you finish a hem can change your whole project. You might notice that hemming techniques in sewing help your garments look neat, fit better, and last longer. Every fabric and garment asks for a different touch. You can choose from many hem types, such as single fold hem, double fold hem, blind hem, rolled hem, baby hems, faced hem, and bias tape hem. If you match your hem to your shirt, pants, or creative piece, you create something special. Sewing lets you explore and try new styles. Have fun with your sewing and see how a simple hem can make a big difference.
Key Takeaways
Hemming methods can make your clothes look and fit better.
There are different hems, like straight and curved.
These hems change how your clothes feel and look.
Picking the right hem helps your clothes last longer.
Trying new hem styles lets you be creative when sewing.
Think about your body shape when you pick a hem.
This helps your clothes fit you well.
Match the hem to the fabric for good results.
Light fabrics need rolled hems.
Heavy fabrics work best with bias-bound hems.
Use a sewing machine for fast and even hems.
Hand-stitching gives you more control with soft fabrics.
Always test your hem on a scrap fabric first.
This helps you see how it will look before you finish.
Why Hem Choice Matters
Style and Fit
When you start sewing, you quickly see how hem choice changes the look and fit of your clothes. The way you finish a hem can make a shirt or pair of pants look sharp or relaxed. Some hems give a classic style, while others add a modern twist. Take a look at this table to see how different hem types affect style and fit:
Hem Type | Effect on Fit and Style | Versatility in Outfits | Body Shape Influence |
|---|---|---|---|
V-cut | Creates a dynamic, elongating effect at the torso, enhancing curves and balancing proportions. | Great for standalone looks, but may complicate layering due to attention drawn to midsection. | Flattering for many body shapes, especially when fitted to highlight the waist. |
Straight | Offers a boxier, more traditional fit, ideal for layering without bulk. | Versatile for various occasions, transitioning easily from business to casual settings. | Provides a neat horizontal baseline, suitable for structured dress codes. |
You can use a V-cut hem to make your shirt or dress look longer and show off your waist. A straight hem gives a neat fit and works well for many occasions. When you sew, you get to pick the hem that matches your style and helps your garment fit just right.
Comfort and Durability
You want your sewing projects to feel good and last a long time. The hem you choose can make a big difference in comfort and durability. Here are some things that help:
Fiber selection changes how soft or strong your garment feels.
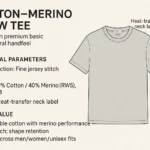
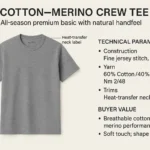
Fabric weight matters. Midweight fabrics (160-180 GSM) give the best balance for comfort and structure.
Side-seamed construction improves fit and reduces fabric waste.
If you pick the right hem, your clothes will fit better and stay comfortable all day. You also help your garment last longer, even after many washes.
Creative Sewing Impact
Hemming is not just about finishing edges. You can use different hems to show off your creativity in sewing. Maybe you want a bold look with a raw hem or a playful style with a rolled hem. You can mix and match hem types to make your garment stand out. Some people like a professional finish, while others enjoy experimenting with new techniques. Sewing lets you try new ideas and see what works best for your fit and style.
Tip: Try using a new hem on your next project. You might discover a style that fits you perfectly!
When you understand how hem choice affects fit, comfort, and style, you can make better decisions in sewing. You get to create garments that look great, feel good, and show off your personality.
Types of Hems in Sewing
You have many choices when you finish the edge of a garment. The types of hems you pick can change the look and feel of your shirt, pant, or sweater. Let’s explore the most common types of hems you’ll see in sewing.
Shirt Hem Types
When you sew a shirt, you want the hem to match the style and purpose. Different shirt hem types give you different results. Here are the most popular shirt hem types you’ll find in stores and patterns:
Curved Hem
A curved hem has a gentle curve at the sides. You often see this hem on casual shirts. It lets you move easily and gives a relaxed look. You might notice curved hems on shirts you wear untucked. This hem works well for everyday wear.
Polo Hem
Polo hem types have a slight curve and a longer back. You see this hem on polo shirts and golf shirts. The longer back helps the shirt stay tucked in when you move. Polo hem types are great for active days or smart-casual outfits.
Rounded Hem
Rounded hem types have a soft, curved edge. This hem feels comfortable and flexible. You often find rounded hems on casual shirts. You can wear these shirts for relaxed occasions or semi-formal events.
Straight Hem
Straight hem types have a flat, horizontal edge. This hem gives a clean and structured look. You see straight hems on dress shirts and office wear. You can pair straight hem shirts with smart-casual pants for a polished style.
Here’s a quick guide to the most popular shirt hem types:
Hem Type | Overview and Features | Ideal Occasions and Pairings |
|---|---|---|
Rounded Hem | Features a gently curved edge, enhancing comfort and flexibility. Ideal for casual wear. | Best for casual or semi-formal occasions, pairs well with casual shirts and relaxed outfits. |
Straight Hem | Flat, horizontal edge providing a clean, structured look, suitable for professional settings. | Perfect for office settings and formal events, pairs well with smart-casual clothing. |
Polo Hem | Slightly curved design with a lower back hem, ideal for active wear and casual settings. | Excels in smart-casual settings, suitable for golf courses and dining out, pairs well with chinos or shorts. |
Tip: Try sewing a curved hem on your next shirt. You’ll notice how easy it is to move and how casual it looks.
Pant Hem Types
Pant hems come in many styles. The types of pant hems you choose can change the whole look of your pant. Let’s look at the most common types of pant hems you’ll find in fashion and sewing.
Straight Hem
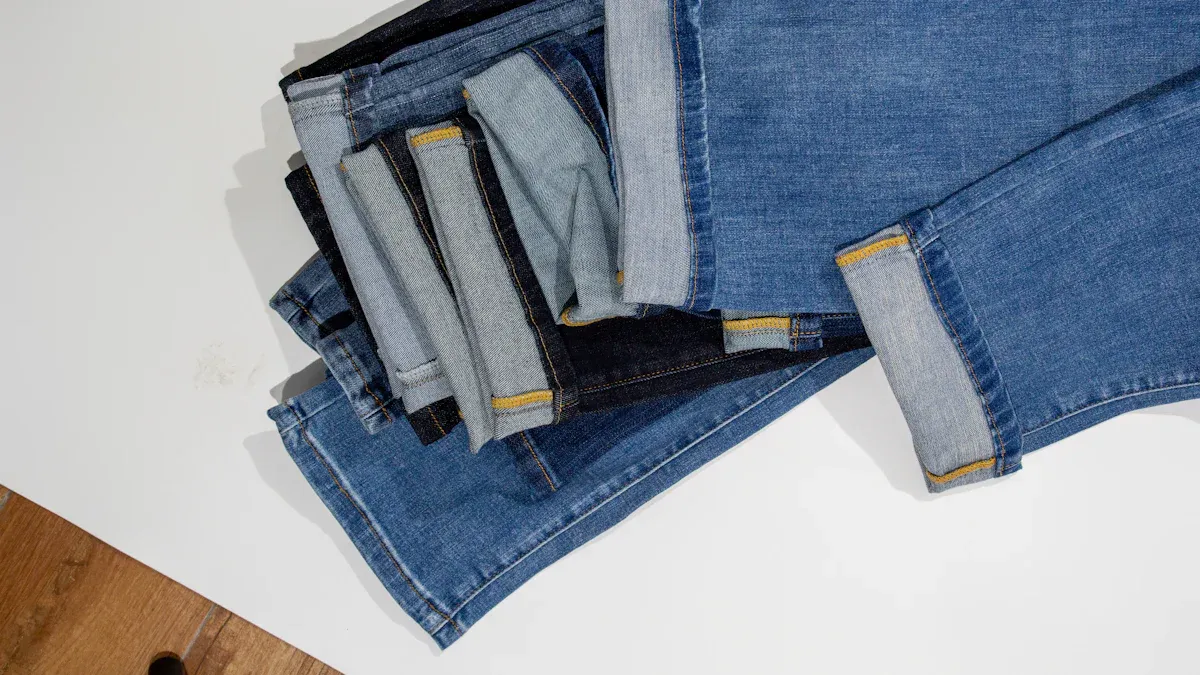
Straight hem types give a classic and simple finish. You see this hem on jeans, chinos, and dress pants. This hem works for almost any occasion. You get a clean look that matches many shirt styles.
Cuffed Hem
Cuffed hem types add a folded cuff at the bottom. You see this hem on dress pants and trousers. Cuffed hems can make your legs look shorter, but they add detail and style. You might choose this hem for a formal pant.
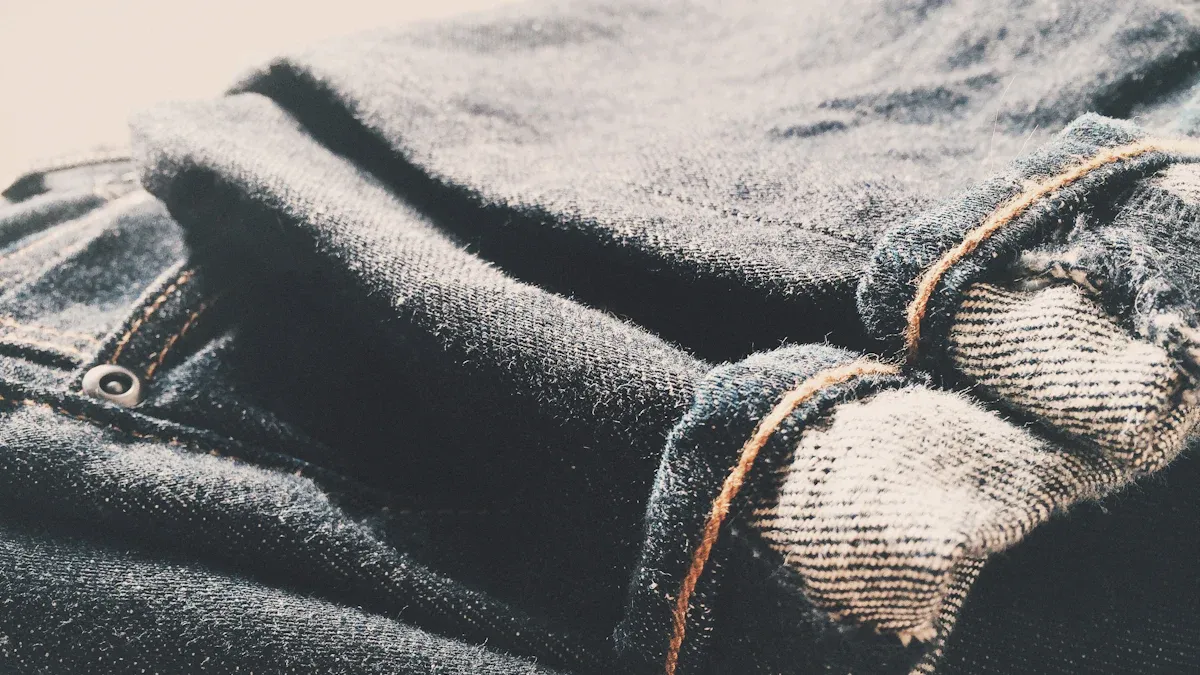
Raw Hem
Raw hem types leave the edge unfinished. You see raw hems on trendy jeans and casual pants. This hem gives a relaxed and modern look. You can try a raw hem for a bold style.
Tapered Hem
Tapered hem types narrow at the bottom. You see this hem on joggers and athletic pants. Tapered hems show off your shoes and give a fitted look. You might pick this hem for sporty outfits.
Blind Hem
Blind hem types use nearly invisible stitches. You see blind hems on formal pants and business attire. This hem gives a clean and professional finish. You can use a blind hem when you want the stitches to disappear.
Double-Stitched Hem
Double-stitched hem types use two rows of stitches. You see this hem on jeans and casual pants. Double-stitched hems add strength and a rugged style. You might choose this hem for pants that need to last.
Euro Hem
Euro hem types keep the original hem when you shorten jeans. You see this hem on denim pants. Euro hems let you keep the factory finish even after you alter the length.
Here’s a table showing the common types of pant hems and where you’ll find them:
Pant Hem Type | Description | Suitable Styles |
|---|---|---|
Straight Hem | Simple, classic, and versatile; gives a clean look. | Jeans, chinos, dress pants |
Cuffed Hem | Adds detail with a visible cuff; can make legs look shorter. | Dress pants, trousers |
Raw Hem | Unfinished look; trendy for casual styles. | Casual styles like jeans |
Tapered Hem | Narrowed at the bottom for a fitted look; shows off shoes. | Joggers, athletic pants |
Blind Hem | Nearly invisible stitches; clean and professional finish. | Formal or business attire |
Double-Stitched Hem | Two rows of stitches for durability; rugged style. | Jeans and casual pants |
Euro Hem | Preserves the original hem while shortening jeans. | Jeans |
Note: If you want your pant to look neat and last longer, try a double-stitched hem. You’ll see the difference after many washes.
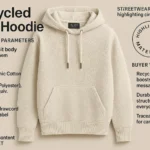
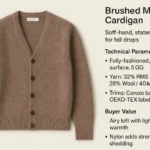
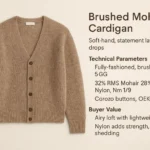
Sweater, Cardigan, Hoodie Hem Types
Sweaters, cardigans, and hoodies need special hem types. The fabric is often stretchy or thick, so you want hems that work well with these materials.
Sweater Hem
Sweater hem types use ribbed bands or folded edges. You see ribbed hems on pullover sweaters. This hem keeps the sweater snug at the waist and wrists. You get a cozy fit that holds its shape.
Cardigan Hem
Cardigan hem types often use folded edges or binding. You see these hems on button-up cardigans. The hem gives a neat finish and helps the cardigan hang well. You might use a simple folded hem for a classic look.
Hoodie Hem
Hoodie hem types use ribbed bands or elastic. You see ribbed hems at the bottom and cuffs of hoodies. This hem keeps the hoodie in place and adds comfort. You can choose a ribbed hem for a sporty style.
Tip: When you sew a sweater or hoodie, pick a hem that stretches with the fabric. Ribbed hems work best for knits.
You have many types of hems to choose from in sewing. Each hem type gives your shirt, pant, or sweater a unique look and feel. Try different shirt hem types and pant hem types to see what works best for your style.
General Hem Styles
When you sew, you get to choose from several general hem styles. Each hem gives your garment a different look and feel. You can pick the hem that matches your fabric, your design, or even your mood. Let’s break down the most popular hem styles you’ll use in sewing.
Double Fold Hem
You see double fold hem on many shirts, pants, and dresses. This hem works well for most fabrics. You fold the edge over twice, then sew it down. The double fold hides the raw edge and keeps your garment neat. You get a strong finish that lasts through many washes. Double fold hem is easy to sew and looks clean on the outside. You can use this hem for casual clothes, school uniforms, or even curtains.
Single Fold Hem
Single fold hem is quick and simple. You fold the edge over once and sew it down. This hem works best for thick fabrics or places where you don’t need a fancy finish. You might use single fold hem on the bottom of a sweater or the edge of a scarf. The single fold hem saves time and gives a soft edge. You can use this hem when you want a relaxed look.
Bound Hem
Bound hem uses a strip of fabric or bias tape to cover the raw edge. You see bound hem on jackets, skirts, and even blankets. The bound hem adds color and strength to your garment. You can pick a matching or contrasting fabric for the binding. Bound hem works well for curved edges or places that need extra durability. You get a hem that stands out and feels sturdy.
Hem Style | How You Make It | Best For | Finish Quality |
|---|---|---|---|
Double Fold Hem | Fold edge twice, sew down | Shirts, pants, dresses | Neat and strong |
Single Fold Hem | Fold edge once, sew down | Sweaters, scarves | Soft and simple |
Bound Hem | Cover edge with binding, sew | Jackets, skirts, blankets | Colorful and tough |
Faced Hem
Faced hem gives your garment a structured edge. You use a facing, which is a separate piece of fabric, to finish the hem. Faced hem works well for garments with unusual shapes or curved edges. You see faced hem on dresses, coats, and special occasion outfits. This hem takes more time, but you get a smooth and professional finish. Faced hem helps your garment hold its shape and look polished.
Different hem styles, such as single fold, double fold, and blind hems, have unique applications based on garment design and fabric type. For instance, a blind stitched hem is ideal for tailored styles like business wear and eveningwear, as it avoids visible stitching that can detract from the garment’s quality. In contrast, a faced hem finish provides structure and is suitable for garments with unusual edges, requiring more time to construct.
Rolled Hem
Rolled hem creates a tiny, rolled edge. You see rolled hem on lightweight fabrics like silk or chiffon. This hem looks delicate and almost invisible. You roll the edge tightly and sew it down. Rolled hem works best for scarves, blouses, and formal wear. You get a hem that feels light and airy. Rolled hem is perfect when you want a soft finish that doesn’t weigh down your garment.
Here’s a quick checklist to help you choose the right hem style for your project:
Use double fold hem for everyday clothes and sturdy fabrics.
Try single fold hem for thick or stretchy materials.
Pick bound hem when you want extra color or strength.
Choose faced hem for special shapes or formal garments.
Go with rolled hem for sheer or lightweight fabrics.
You can experiment with these hem styles to see which one you like best. Each hem gives your garment a different personality. When you try new hem techniques, you learn what works for your sewing style. You might find that a simple hem can make your project look professional or creative.
Hemming Techniques in Sewing
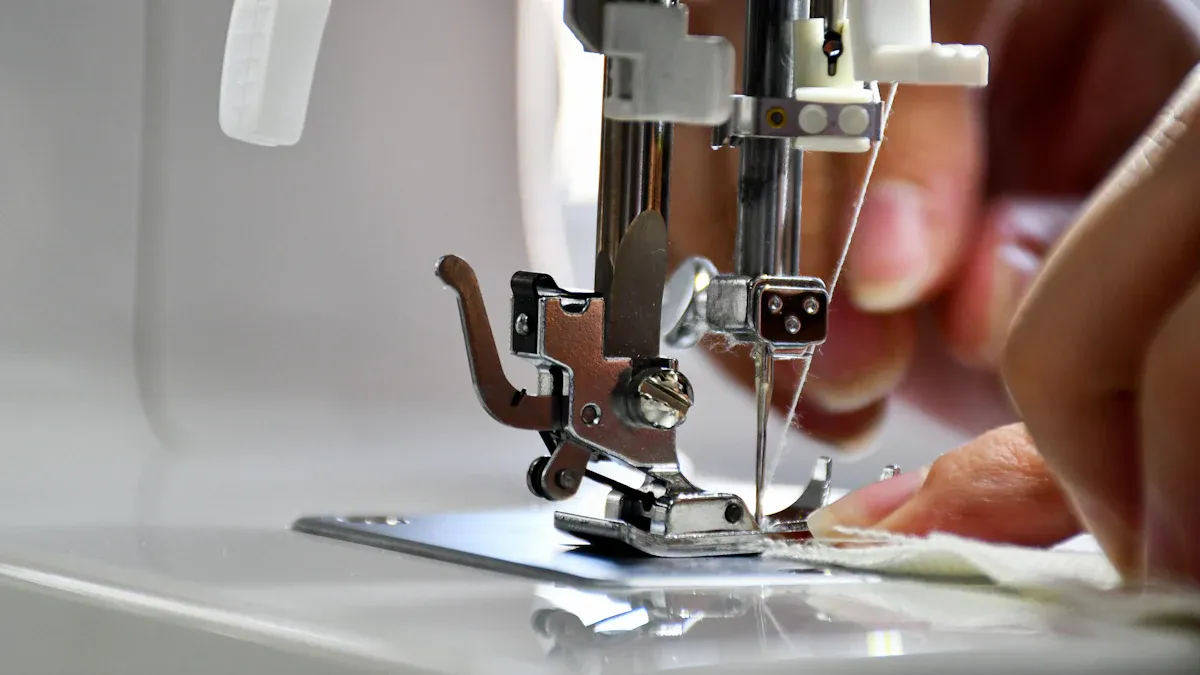
Machine Hem
If you want speed and consistency, machine hemming techniques in sewing are your best friend. You use a sewing machine to create strong, even stitches along the edge of your garment. This method works well for shirts, pants, and even creative garments. You get a professional look with less effort. Machine hems are perfect when you want your project done quickly and you need the hem to last through lots of wear.
Here’s a quick look at how machine hemming compares to hand-stitching:
Method | Advantages | Disadvantages |
|---|---|---|
Hand Sewing | Precision for delicate work, portable, versatile | Slower, may not be as strong, needs practice |
Machine Sewing | Fast, strong seams, consistent and professional results | Requires machine knowledge, costs more, less portable |
You can see that machine hemming techniques in sewing give you speed and strength. You get even stitches every time. If you want to hem jeans, shirts, or dresses, you can trust your sewing machine to do the job.
Tip: Try using a rolled hem foot on your machine. You’ll get a neat, tiny edge that looks great on lightweight fabrics.
Hand-Stitched Hem
Sometimes you want more control over your stitches. Hand-stitched hemming techniques in sewing let you work slowly and carefully. You use a needle and thread to sew the hem by hand. This method is great for delicate fabrics, curved edges, or places where you want invisible stitches.
Hand-stitching gives you precision. You can sew a rolled hem on silk or chiffon and keep the edge tidy. You can also use hand hemming for garments that need a soft finish. You don’t need a machine, so you can sew anywhere. You just need patience and practice.
If you want to hem a fancy dress or a scarf, try a hand-stitched rolled hem. You’ll see how smooth and light the edge feels. You can also use hand hemming techniques in sewing for repairs or small projects.
Narrow Machined Hem
When you work with delicate fabrics, you need a hem that won’t weigh down your garment. Narrow machined hemming techniques in sewing help you create a tiny, neat edge. You use your sewing machine to fold the fabric over just a little and sew close to the edge. This method works well for blouses, skirts, and scarves.
You can use a rolled hem foot or a serger to make a narrow rolled hem. This technique keeps the edge from fraying and gives your garment a soft, elegant look. You’ll see narrow machined hems on silk, organza, and other lightweight materials. If you want your garment to look light and airy, try a narrow rolled hem.
Narrow rolled hems work best for delicate fabrics. You get a tidy finish and stop fraying.
Serged rolled hems are also good for lightweight materials. You get a discreet hem that matches the style of your garment.
If you want to experiment, try different hemming techniques in sewing. You can mix machine hems, hand-stitched hems, and rolled hem styles to see what works best for your project. You’ll learn how each method changes the look and feel of your garment.
Note: Rolled hem techniques are perfect for sheer fabrics. You get a finish that looks almost invisible and feels soft against your skin.
Raw Hem Finish
You might see raw hem finishes everywhere these days, especially on jeans and creative garments. This style leaves the edge of the fabric unfinished, so you get a look that feels bold and modern. You don’t need to fold or tuck the edge. You just cut the fabric and let it show. Sometimes, you see a little fraying, which adds character.
Raw hems work best when you want your clothes to stand out. You can use this finish on denim, cotton, or even knits. Many designers love raw hems because they give garments an authentic, lived-in vibe. You can make your own raw hem by cutting the edge straight and then washing the garment to let the threads loosen up. If you want less fraying, you can stitch just above the edge to hold the threads in place.
Here’s why raw hem finishes are getting more popular:
Many people want eco-friendly fashion. Raw hem jeans are part of a growing trend, and experts say this style could make up 35% of the denim market by 2028.
New manufacturing methods, like laser finishing and eco-conscious dyeing, help raw hem jeans last longer and use less water.
Smart textiles and strong fiber blends make these garments more comfortable and durable, so you can wear them for years.
You might think raw hems look unfinished, but they actually show off your creativity. You can pair raw hem jeans with a crisp shirt for a cool contrast. You can also use raw hems on skirts, jackets, or even sleeves. If you want to try something new, start with a simple project. Cut the edge, wash the garment, and see how it changes.
Tip: If you want to keep your raw hem neat, use a zigzag stitch or a serger just above the edge. This helps stop too much fraying.
Raw hem finishes let you express your style and support sustainable fashion. You get a look that feels fresh and unique, and you help the planet by choosing garments that use less water and energy.
Roll Hem (Serger)
Roll hem with a serger gives you a tiny, neat edge that looks almost invisible. You use a serger machine, which trims the fabric and wraps the edge with thread at the same time. This hemming technique in sewing works best for lightweight fabrics like chiffon, silk, or organza. You get a finish that feels soft and airy.
You might use a roll hem when you sew scarves, blouses, or dresses. The serger makes the edge curl tightly, so you don’t see any raw threads. You can choose thread colors that match or contrast with your fabric. If you want a delicate look, pick a matching thread. If you want something bold, try a bright color.
Here’s a simple table to show where roll hem (serger) works best:
Garment Type | Fabric Type | Roll Hem Benefits |
|---|---|---|
Scarf | Chiffon, silk | Light, soft, elegant |
Blouse | Organza, voile | Neat, professional edge |
Dress | Tulle, georgette | Invisible, airy finish |
You don’t need to be an expert to use a serger for roll hems. You just set the machine to the roll hem setting, feed the fabric, and let the serger do the work. You get a strong edge that won’t fray, even after many washes.
Note: If you don’t have a serger, you can use a rolled hem foot on your regular sewing machine. You’ll get a similar look, but the serger makes it faster and cleaner.
Roll hem (serger) is one of the best hemming techniques in sewing for delicate projects. You get a finish that looks professional and feels light. Try it on your next creative garment and see how it changes the style.
Hemline Styles for Creative Garments
When you want your clothes to stand out, you can play with different hemline styles. These hem styles change the way your garment looks and moves. Let’s explore three popular hemlines you’ll see in creative fashion: A-Line, Asymmetrical, and Bubble.
A-Line
A-line hemline styles are a favorite in dresses and skirts. You’ll notice the shape looks like the letter “A.” The garment flares out from the waist or shoulders, so you get a gentle, flowing look. This style works for almost any body type. If you want to make your legs look longer or add a bit of movement, you can choose an A-line hem. The flare creates a soft silhouette and helps you feel comfortable.
Tip: Try an A-line dress for school events or parties. You’ll get a classic look that never goes out of style.
Here’s a quick table to show what makes A-line hemlines special:
Hemline Style | Main Feature | Best For |
|---|---|---|
A-Line | Flares out from waist | Dresses, skirts |
A-line hem styles give you a timeless look. You can wear them for casual days or special occasions. The shape flatters many figures and feels easy to move in.
Asymmetrical
If you want something bold, asymmetrical hemline styles are a great choice. These hemlines don’t follow a straight line. You might see one side longer than the other or a diagonal cut across the bottom. Asymmetrical hem styles create a dynamic look and draw attention. The uneven shape makes your outfit look modern and fresh.
Asymmetrical hemlines use diagonal lines to change your silhouette.
The design can make your legs look longer and add height.
The fabric moves freely, so you get a graceful stride.
These hemline styles work for casual, formal, and even avant-garde outfits.
You can wear an asymmetrical skirt with a simple top and stand out in any crowd. The irregular cut interrupts the usual horizontal line, so your eye follows the diagonal movement. This trick helps you look taller and slimmer.
Note: Asymmetrical hem styles are perfect if you want to try something new and creative. You can find them in dresses, tops, and even pants.
Bubble
Bubble hemline styles give your garment a playful twist. You’ll see the bottom edge gathered and tucked under, which creates a round, puffy shape. Bubble hem styles became popular in the early 2000s and are making a comeback in 2024. If you want a fun look, you can try a bubble skirt or dress.
Bubble hemlines use gathering to create volume.
The hem styles add bounce and movement to your outfit.
You can wear bubble hemline styles for parties, dances, or any time you want to stand out.
Bubble hem styles work best with lightweight fabrics. The gathered edge keeps the shape, so you get a bubbly effect that feels lively and young.
Tip: Pair a bubble skirt with a fitted top. You’ll balance the volume and create a cute, trendy look.
When you experiment with different hemline styles, you discover new ways to express yourself. A-line, asymmetrical, and bubble hem styles each offer something unique. You can mix and match these hemlines to create garments that fit your personality and style.
Fishtail
You might see fishtail hemlines on dresses at fancy parties or weddings. This style has a longer back and a shorter front, almost like a mermaid’s tail. When you walk, the back of your dress trails behind you. You get a dramatic look that feels special. Fishtail hems work well for formal events because they add elegance and movement. If you want to stand out, try a fishtail hem on your next skirt or gown.
Here’s a quick table to help you spot a fishtail hem:
Feature | What You Notice |
|---|---|
Shape | Longer in back, shorter in front |
Movement | Flowing, graceful |
Best For | Formal dresses, evening wear |
Tip: If you want to look taller, a fishtail hem can help. The long back draws the eye down and makes your legs look longer.
Flared
Flared hemlines give your garment a wide, flowing edge. You see this style on skirts, dresses, and even some pants. The fabric opens up at the bottom, so you get lots of movement when you walk or dance. Flared hems feel playful and light. You can spin around and watch the fabric swirl. This style works for casual outfits and party clothes.
Flared hemlines make your clothes move with you.
You get a soft drape that feels comfortable.
The wide edge helps your garment look lively and fun.
If you want a skirt that twirls or a dress that feels breezy, pick a flared hem. You can wear flared styles to school, parties, or just for fun. The extra fabric at the bottom lets you move easily and adds a touch of excitement to your outfit.
Handkerchief
Handkerchief hemlines look unique and stylish. You’ll notice the edges point down in different places, almost like the corners of a handkerchief. This design creates an uneven, flowing look. When you walk, the fabric moves in all directions. You get a flattering silhouette that softly skims your curves. The handkerchief hem adds an elegant twist to classic shapes. Every step you take shows off effortless grace.
The flowing, asymmetrical design enhances movement.
You get a soft drape that flatters your body.
Handkerchief hems offer a creative look for dresses, skirts, and tops.
Note: If you want your garment to feel special, try a handkerchief hem. You’ll love how it moves and how it makes you feel confident.
Handkerchief hemlines work well with lightweight fabrics. You can wear them for dances, parties, or any time you want to feel graceful. The style gives you a chance to show off your personality and try something new.
High-Low
You might see high-low hemlines in dresses, skirts, and even tops. This style means the front hem sits higher than the back. When you walk, the longer back flows behind you. You get a dramatic look that feels modern and fun. High-low hems work well for parties, dances, or any time you want to stand out.
Why choose a high-low hem?
You show off your shoes and legs in the front.
The back gives you coverage and movement.
You get a playful twist on classic shapes.
Tip: Try a high-low skirt with boots or sandals. You’ll love how the hem shows off your footwear!
Here’s a quick table to help you spot high-low hemlines:
Feature | What You Notice | Best For |
|---|---|---|
Front | Shorter, above the knee | Showing off shoes |
Back | Longer, flowing | Adding drama and style |
High-low hems let you mix elegance with fun. You can wear them for school dances, birthday parties, or just when you want to feel special.
Ruffled
Ruffled hemlines add texture and movement to your clothes. You see ruffles as gathered or pleated fabric along the edge. This style creates a soft, bouncy look. Ruffled hems work well for dresses, skirts, and even sleeves.
Why do ruffles stand out?
They add volume and flair.
You get a playful, romantic vibe.
Ruffles move with you, making your outfit lively.
Note: Ruffled hems look great with lightweight fabrics like cotton or chiffon. You get extra bounce and comfort.
Here’s how you can use ruffled hemlines:
Try a ruffled skirt for a party or dance.
Add ruffles to a dress for a sweet, girly look.
Use ruffled sleeves to make a simple top more interesting.
Ruffled hems let you show off your creative side. You can layer ruffles for extra drama or keep them simple for a soft touch.
Shark-Bite
Shark-bite hemlines look bold and edgy. You see this style with uneven points at the sides, almost like a shark’s bite. The hem dips down at the sides and rises in the middle. Shark-bite hems work well for tunics, tops, and dresses.
What makes shark-bite hems unique?
You get a cool, asymmetrical shape.
The hem creates movement and interest.
Shark-bite styles flatter many body types.
Tip: Pair a shark-bite top with leggings or skinny jeans. You’ll get a balanced look that feels trendy.
Here’s a simple list of shark-bite hem features:
Points at the sides
Shorter in the front and back
Works best with soft, draping fabrics
Shark-bite hemlines help you stand out. You can wear them for casual days, school, or even special events. If you want a hem that feels different and fresh, try the shark-bite style.
Shirt Tail
You might see the shirt tail hem on button-down shirts and casual tops. This hem curves up at the sides and drops lower in the front and back. The shape looks a bit like the tail of a shirt, which is where it gets its name. You get a relaxed style that works well for untucked looks. The shirt tail hem helps your shirt move with you and gives extra coverage when you sit or bend.
Here’s a quick table to show what makes the shirt tail hem special:
Feature | What You Notice | Best For |
|---|---|---|
Curved Sides | Higher at the sides | Casual shirts, tunics |
Dropped Front/Back | Longer in front and back | Untucked styles |
Movement | Easy to move and sit | Everyday wear |
Tip: Try a shirt tail hem if you want a top that looks good untucked. You’ll get a laid-back vibe and a comfortable fit.
You can use the shirt tail hem for both men’s and women’s shirts. This hem works with many fabrics, like cotton or linen. If you want a classic look with a twist, the shirt tail hem is a great choice.
Slanted
Slanted hems give your garment a diagonal edge. You see this style on skirts, dresses, and tops. The hem starts higher on one side and drops lower on the other. You get a bold look that draws the eye and adds movement. Slanted hems help you stand out and make your outfit look modern.
Why pick a slanted hem?
You get a dynamic shape that flatters your legs.
The diagonal line makes you look taller.
Slanted hems work with many fabrics, from knits to wovens.
Here’s a simple list of slanted hem features:
Diagonal edge
Asymmetrical style
Great for creative outfits
Note: If you want to try something new, sew a slanted hem on a skirt or top. You’ll see how the angle changes your whole look.
Slanted hems let you play with shapes and lines. You can pair a slanted skirt with a simple shirt for a cool contrast. This hem style works for both casual and dressy occasions.
Slit
A slit hem adds an opening or cut in the garment’s edge. You see slits on skirts, dresses, pants, and even sleeves. The slit can be short or long, in the front, back, or side. You get extra movement and a touch of style. Slit hems help you walk easily and show off your legs or shoes.
Here’s a table to help you understand slit hems:
Feature | What You Notice | Best For |
|---|---|---|
Opening | Cut or split in the hem | Skirts, dresses, pants |
Placement | Side, front, or back | Adding movement |
Style | Casual or formal | Showing off shoes/legs |
Tip: If you want a skirt that’s easy to walk in, add a side slit. You’ll get comfort and a stylish edge.
You can use slit hems for sporty looks or fancy outfits. The slit lets you move freely and adds a little drama. Try a slit hem on your next project and see how it changes your style.
Step
Step hemlines give your clothes a cool, modern edge. You see this style when the hem drops down in sections, almost like stairs. Each “step” creates a new level, so the bottom of your skirt or dress looks like it has layers that move up and down. This hemline stands out because it breaks away from the usual straight or curved lines.
You might spot step hems on trendy skirts, tunics, or even some pants. Designers love this look because it adds instant interest. When you walk, the steps move and catch the light. You get a playful, architectural vibe that feels fresh and bold.
Why try a step hem?
You want a unique look that grabs attention.
You like geometric shapes and sharp lines.
You want to show off your shoes or leggings.
Tip: Pair a step hem skirt with simple tops. Let the hem be the star of your outfit!
Here’s a quick table to help you picture step hemlines:
Feature | What You Notice | Best For |
|---|---|---|
Levels/Steps | Hem drops in sections | Skirts, tunics, dresses |
Movement | Steps swing as you walk | Trendy, modern outfits |
Style | Bold, geometric, playful | Fashion-forward looks |
You can sew a step hem by cutting the fabric into different lengths and finishing each edge. Try this style if you want to experiment with something new. You’ll love how it makes your garment pop!
Tiered
Tiered hemlines bring layers and volume to your clothes. You see this style when the garment has several horizontal layers stacked on top of each other. Each tier adds fullness and movement, so your skirt or dress looks soft and bouncy.
You often find tiered hems on maxi skirts, sundresses, and even some tops. This style works well with lightweight fabrics like cotton, voile, or chiffon. The layers move with you, making every step feel fun and breezy.
Why choose a tiered hem?
You want extra volume without heavy fabric.
You love a romantic, boho, or vintage vibe.
You want a skirt or dress that twirls and sways.
Note: Tiered hems look best with soft, flowy fabrics. Stiff materials can make the layers stick out too much.
Here’s a list of ways to use tiered hemlines:
Make a summer dress with three or more tiers for a festival look.
Add two tiers to a skirt for a playful, everyday style.
Try a tiered ruffle on a top for extra flair.
You can sew each tier by gathering the fabric and attaching it to the layer above. This creates a gentle, cascading effect. Tiered hemlines let you play with color, too. Use different fabrics for each layer if you want a bold, patchwork look.
Tiered hems never go out of style. You get comfort, movement, and a touch of drama. If you want to feel like spinning around just for fun, a tiered hem is the way to go!
How to Choose the Right Hem
Body Type
You want your garment to look good and feel comfortable. The way you choose the right hem can help you achieve a custom fit for your body shape. Different hem types work better for different figures. If you pick the perfect length and style, you get a perfect fit and show off your overall style.
Take a look at this table to see which hem works best for your body type:
Body Type | Hem Type | Description |
|---|---|---|
Rectangular/Slim | Straight Hem | Creates a balanced look, reduces bulk when tucked in. |
Broader Frames | Curved Hem | Offers a slimming effect and ease for untucked styles. |
Shorter Figures | Rounded Hem | Visually elongates with a slight drop at the sides. |
Athletic Builds | Polo Hem | Features a dropped-back design for added coverage and neat fit during movement. |
Muscular/Varied | Roomier Designs | Consider side gussets for comfort and fit. |
If you have a rectangular or slim shape, a straight hem gives you a balanced look. For broader frames, a curved hem helps you look slimmer and feels relaxed when you wear your shirt untucked. Shorter figures can try a rounded hem to make your legs look longer. Athletic builds often like polo hems because the dropped-back design adds coverage and keeps the shirt neat while you move. Muscular shapes might need roomier designs with side gussets for extra comfort.
When you want the perfect fit, think about your body type and how the hem will change the shape of your garment. Tailoring is important, especially if you want your clothes to look custom-made. Getting your pants tailored can help you find the perfect length and match the hem to the shoe you plan to wear.
Occasion
You need to think about where you will wear your garment. The occasion helps you choose the right hem for your outfit. Some hems look formal, while others feel casual and relaxed.
Here are some popular hem types for different occasions:
Blind hem: This is great for formal attire. You get a clean and professional look with stitches that stay hidden.
Cuffed hem: Adds sophistication to your pants or shirts. You see this style in traditional or formal outfits.
Rolled hem: Perfect for casual days. This hemming technique gives your garment a relaxed vibe.
Original hem: Keeps the original style of pants, especially designer jeans. You keep the factory finish even after altering the length.
If you want to look polished at a wedding or business meeting, pick a blind hem or cuffed hem. For weekends or school, a rolled hem feels easy and fun. When you want to keep your jeans looking new, use the original hem. Always think about the event before you decide on the hem type.
Personal Style
Your personal style matters when you choose the right hem. You can use hemming techniques to show off your fashion identity. Maybe you like classic looks, or you want something bold and creative. Adjusting the length or picking an asymmetrical hem lets you create a unique silhouette. You can add contrasting colors or special shapes to make your hem stand out.
If you want your garment to reflect your personality, try a custom hem. You can play with the perfect length, add ruffles, or use a shark-bite design. Every choice you make helps you achieve a custom fit and show off your overall style. Hemming technique is not just about finishing the edge. It is about making your clothes feel like you.
Tip: Don’t be afraid to experiment. Try a new hem style on your next project. You might discover a look that fits you perfectly!
When you match the hem to the shoe, think about how the length will change your outfit. A shorter hem shows off your sneakers or boots. A longer hem adds drama and elegance. You get to decide what works best for your design and your life.
Choosing the right hem means thinking about your body type, the occasion, and your personal style. You want your garment to have the perfect fit and the perfect length. Tailoring is important, so don’t skip this step. When you experiment with different hems, you learn what makes you feel confident and comfortable.
Practical Tips
You want your garment to look great and feel comfortable. Picking the right hem can make a big difference. Here are some practical tips to help you choose the right hem for any project:
Think about the style of your garment. If you sew a t-shirt or a pair of jeans, a visible hem works well. It adds a casual touch and lets knit fabrics stretch. For a dress shirt or formal pants, a blind hem gives you a polished look. The stitches stay hidden, so your clothes look neat and professional.
Match your hemming technique to the fabric. Lightweight woven fabrics, like chiffon or voile, need a rolled hem. This keeps the edge tiny and smooth. Medium-weight fabrics, such as cotton or linen, look best with a double-fold hem. Heavy fabrics, like denim or wool, need a bias-bound hem for extra strength. If you work with knits, try a twin needle hem. It stretches with the fabric and looks clean.
Choose your stitching method carefully. Hand stitching works best for delicate fabrics or when you want precise control. You can use it for silk scarves or special occasion dresses. Machine stitching is fast and strong. It works well for everyday clothes and decorative hems.
Use the right tools for the job. A good iron helps you press the hem flat. A hem gauge lets you measure the fold evenly. Quality needles and thread make your stitches strong and smooth. These tools help you get a professional finish every time.
Tip: Always test your hem on a scrap piece of fabric first. You can see how the stitches look and make changes before you sew the real garment.
Here’s a quick table to help you match hem types to fabric and style:
Garment Type | Best Hem Type | Why It Works |
|---|---|---|
T-shirt, Jeans | Visible Hem | Casual look, allows stretch |
Dress Shirt, Slacks | Blind Hem | Invisible finish, polished |
Silk Scarf | Rolled Hem | Tiny edge, delicate fabrics |
Denim Jacket | Bias-Bound Hem | Strong, durable finish |
Knit Dress | Twin Needle Hem | Stretches, neat appearance |
If you follow these tips, you can choose the right hem for any project. You’ll get clothes that fit well, last longer, and show off your style. Try different techniques and see which ones you like best. Sewing is all about experimenting and finding what works for you!
Matching Hem Types to Fabrics
Lightweight Fabrics
When you work with lightweight fabrics, you want your hem to look neat but not weigh down your garment. Fabrics like chiffon, voile, and organza feel soft and floaty. You need a hem that matches this style. Textile experts say baby hem and rolled hem work best for these materials. Both hem types keep the edge tiny and smooth, so your garment stays light and elegant.
Here’s a table to help you pick the right hem for lightweight fabrics:
Hem Type | Description | Suitable Fabrics |
|---|---|---|
Baby Hem | A narrow, double fold hem for a crisp, tiny edge | Chiffon, Voile, Organza |
Rolled Hem | Delicate finish, almost invisible, perfect for sheers | Chiffon, Satin, Organza |
If you want your garment to look professional, try a rolled hem on a scarf or blouse. Baby hem works well for dresses and skirts. Both options help your garment move freely and look stylish.
Tip: Always test your hem on a scrap piece of fabric first. You can see how the stitches look before you finish your garment.
Heavy Fabrics
Heavy fabrics like denim, canvas, and wool need strong hems. You want your garment to last and hold its shape. Some hems can get bulky, so you need to choose the right technique. For these fabrics, a bias-bound hem is a smart choice. It keeps the edge clean and stops the hem from feeling thick.
Here are some ways to make your hem work for heavy fabrics:
Use a bias-bound hem to minimize bulk and give your garment a tidy finish.
Trim the hem allowance so the edge does not show through.
Grade the seam allowances to help the hem lay flat.
Pick lighter interfacing if you need extra support.
Try a faced hem instead of a folded hem for a smooth look.
If you sew a pair of jeans or a wool coat, these tips help your garment stay comfortable and durable. You want your hem to look good and feel strong, even after many wears.
Note: Heavy fabrics can be tough to sew. Take your time and use sharp needles for the best results.
Non-Fraying Fabrics
Some fabrics do not fray much, like felt, fleece, or some knits. You have more freedom when you hem these materials. You can leave the edge raw, use a single fold, or try a decorative finish. Your garment will not fall apart, so you can get creative.
Here are some ideas for hemming non-fraying fabrics:
Leave the edge raw for a modern look.
Use a single fold hem for a quick finish.
Add a decorative stitch to make your garment stand out.
If you make a fleece blanket or a knit top, you can experiment with different hem styles. Your garment will stay neat, and you can show off your sewing skills.
Tip: Non-fraying fabrics are great for beginners. You can practice new hem techniques without worrying about the edge unraveling.
When you match your hem to the fabric, your garment looks better and lasts longer. Try different styles and see which one works best for your project.
Sheer Fabrics
Sheer fabrics look beautiful and feel light. You might use chiffon, organza, tulle, or georgette for dresses, blouses, or scarves. These fabrics show off soft drapes and let light pass through. When you sew with sheer fabrics, you need to pick the right hem type. The wrong hem can make your garment look bulky or messy.
You want your hem to stay tiny and neat. Rolled hems work best for sheer fabrics. You use a rolled hem foot on your sewing machine or stitch by hand. The edge rolls up tightly, so you see almost no raw fabric. This finish looks delicate and keeps the garment light. You can use a narrow machined hem for a similar effect. Both options help your garment move and flow.
Here’s a table to help you choose the best hem for sheer fabrics:
Hem Type | Why It Works for Sheer Fabrics | Garment Examples |
|---|---|---|
Rolled Hem | Tiny, almost invisible, keeps edge neat | Scarves, blouses, dresses |
Narrow Machined Hem | Small, clean, prevents fraying | Skirts, overlays |
Precise, soft, invisible on right side | Formal wear, silk tops |
You might want to try a hand-stitched hem if you want the stitches to disappear. This method works well for silk and other delicate sheers. You sew slowly and keep your stitches tiny. Your hem stays soft and smooth.
Tip: Always test your hem on a scrap piece of sheer fabric. You can see how the stitches look before you finish your garment.
Sometimes you want a decorative touch. Bound hems add color and texture. You use bias tape or a strip of soft fabric to cover the edge. This style works for special projects like dance costumes or party dresses. You can pick a matching color or try something bold.
Sheer fabrics fray easily. You need to handle them gently. Use sharp scissors and pins. Press your hem with a cool iron. If you rush, you might stretch or tear the fabric. Take your time and enjoy the process.
You can use sheer fabrics for overlays, sleeves, or ruffles. Each part of your garment needs a hem that matches the style. Rolled hems keep overlays light. Bound hems add strength to sleeves. Hand-stitched hems make ruffles look soft.
Note: Sheer fabrics show every stitch. Keep your hem tidy and your thread color close to the fabric shade.
When you match your hem to sheer fabric, you get a garment that looks professional and feels comfortable. You can wear your finished piece to parties, dances, or special events. Try different hem types and see which one you like best!
Construction Methods for Hems
Double Fold Hem Steps
You’ll use the double fold hem on lots of shirts and pants. This method hides the raw edge and gives your clothes a neat finish. Here’s how you do it:
Measure how much fabric you want to hem. Decide the final length before you start.
Fold the fabric toward the inside by about half an inch. Press it flat with an iron.
Fold the fabric again toward the inside. Make sure the total folded amount matches your measurement. Press it again.
Pin the hem in place so it doesn’t move.
Try on the garment or check the hem to make sure it looks right.
Sew along the edge using a straight stitch or another stitch that works for your fabric.
Tip: Always press each fold with an iron. This helps your double fold hem stay crisp and even.
You’ll see this hem on many types of hem finish because it works for both light and medium-weight fabrics. It’s strong and looks tidy, so it’s a favorite for everyday clothes.
Single Fold Hem Steps
The single fold hem is quick and easy. You’ll use it when you want a soft edge or when the fabric doesn’t fray much. Here’s how you make a single fold hem:
Fold the edge of your fabric toward the inside once. The fold can be as wide as you want, but usually about half an inch.
Press the fold flat with an iron.
Pin the hem in place.
Sew close to the folded edge.
You’ll find the single fold hem on knits, fleece, or places where you don’t need a fancy finish. It’s one of the simplest types of hem finish, and it saves time when you’re in a hurry.
Note: The single fold hem works best on fabrics that don’t fray or when you want a relaxed look.
Bound Hem Steps
A bound hem adds color and strength to your garment. You’ll use a strip of fabric or bias tape to cover the raw edge. Here’s how you do a bound hem:
Cut a strip of bias tape or fabric, long enough to go around the edge you want to finish.
Place the right side of the binding against the right side of your garment edge.
Sew the binding to the edge, using a quarter-inch seam allowance.
Fold the binding over the raw edge to the inside (or outside for a decorative look).
Press the binding flat and pin it in place.
Sew along the edge of the binding to secure it.
Bound hems work well for jackets, skirts, and curved edges. They’re great when you want your hem to stand out or last a long time.
Try using a bright color for your bound hem if you want your garment to pop!
Faced Hem Steps
A faced hem gives your garment a smooth, structured edge. You use a separate piece of fabric, called a facing, to finish the hem. This method works well for curved hems or when you want a crisp look.
Here’s how you can sew a faced hem:
Cut a facing strip that matches the shape and length of your garment’s hem. Make it about 2 inches wide.
Place the right sides of the facing and garment together. Line up the raw edges.
Pin the facing to the hem. Use plenty of pins to keep it from shifting.
Sew along the edge with a straight stitch, about 1/4 inch from the edge.
Trim the seam allowance if the fabric is thick. Clip curves if needed so the hem lays flat.
Turn the facing to the inside of the garment. Press the fold with an iron.
Pin the facing in place on the inside. Make sure it sits flat.
Sew the facing down close to the inner edge, or hand-stitch for an invisible finish.
Give the hem a final press for a crisp look.
Tip: Use a lightweight fabric for the facing if your main fabric is thick. This helps the hem stay smooth.
Rolled Hem Steps
A rolled hem creates a tiny, neat edge. You often see this hem on scarves, blouses, or dresses made from lightweight fabric.
Follow these steps for a rolled hem:
Fold the raw edge of your fabric to the inside by about 1/8 inch. Press with an iron.
Fold it again by another 1/8 inch. Press again to keep it tight.
Pin the hem in place if needed.
Sew close to the inner folded edge. Use a straight stitch or a narrow zigzag.
Remove pins as you sew. Keep the fabric smooth.
Press the finished hem for a crisp, delicate edge.
You can use a rolled hem foot on your sewing machine to make this process even easier. The foot rolls the fabric as you sew, so you get a perfect tiny hem every time.
Note: Rolled hems work best on lightweight fabrics like chiffon, silk, or voile.
Machine Hem Steps
Machine hemming gives you a fast, strong finish. You can use this method for shirts, pants, skirts, and more. To get a professional result, follow these best practices:
Use sharp fabric scissors to cut the hem edge cleanly.
Measure your hem allowance with a quality measuring tape. Most hems need about 1/2 inch to 1 inch.
Mark the hemline clearly with a fabric marker for accuracy.
Fold the raw edge under by 1/4 inch to 1/2 inch. Press flat with an iron.
Fold again if you want a double fold hem. Press each fold.
Pin the hem in place. Place pins perpendicular to the edge, about every 2-3 inches.
Check that your folds are even using a ruler or tape.
Iron the hem area before and after pinning to set the folds.
Do a quick quality check to make sure the hemline looks even.
Sew along the folded edge with a straight stitch. Remove pins as you go.
Tip: Always press your hem after sewing. This sets the stitches and gives your garment a crisp, finished look.
Machine hemming saves time and gives you a neat, durable edge. Try these steps on your next project for a polished result!
Hand-Stitched Hem Steps
Hand-stitching a hem gives you control and a soft finish. You can use this method for delicate fabrics or when you want invisible stitches. Here’s how you do it:
Measure and mark your hemline. Use chalk or a fabric marker.
Fold the edge of your fabric to the inside. Press it flat with an iron.
Fold the edge again if you want a double fold. Press it once more.
Pin the hem in place. Make sure the fold stays even.
Thread your needle. Pick a color that matches your fabric.
Use a slip stitch or blind stitch. Catch just a few threads from the garment and then go through the folded edge.
Keep your stitches small and even. Space them about 1/4 inch apart.
Remove pins as you sew.
Press the hem again when you finish.
Tip: Hand-stitching works best for silk, chiffon, or wool. You get a neat edge without bulky seams.
Here’s a quick table to help you choose the right hand stitch:
Stitch Type | Best For | Look |
|---|---|---|
Slip Stitch | Invisible hems | Hidden |
Catch Stitch | Stretchy fabrics | Flexible |
Running Stitch | Quick repairs | Visible |
Blind Hem Steps
Blind hems look professional because you barely see the stitches. You can use this method for dress pants, skirts, or formal shirts. You can sew a blind hem by hand or with a machine. Here’s how you do it by hand:
Fold the hem to the inside. Press it flat.
Fold the raw edge under so it sits just below the hem fold.
Pin the hem in place.
Thread your needle with matching thread.
Take a tiny stitch in the garment, then a longer stitch in the folded edge.
Repeat this pattern. Keep the stitches small and spaced out.
Remove pins as you sew.
Press the hem when you finish.
If you use a sewing machine, set it to the blind hem stitch. Fold the fabric as above, then sew along the edge. The machine will catch just a bit of the garment and most of the folded edge.
Note: Blind hems work best for formal clothes. You get a clean look with almost invisible stitches.
Raw Hem Steps
Raw hems give your garment a trendy, unfinished look. You see raw hems on jeans, shorts, and casual tops. You don’t need to fold the edge. You just cut and finish it. Here’s how you do a raw hem:
Mark your hemline with chalk or a ruler.
Cut the fabric straight across.
Use a zigzag stitch or serger just above the edge. This helps stop too much fraying.
Wash the garment to let the threads loosen up.
Trim any long threads after washing.
Tip: Raw hems work best on denim, fleece, or knits. You get a cool, modern style.
If you want less fraying, you can add a line of stitching close to the edge. You can also use fabric glue or fray check for extra security.
Here’s a quick checklist for raw hems:
Cut straight
Finish with zigzag or serger
Wash and trim
Raw hems let you show off your creative side. You get a bold look with very little effort!
Narrow Machined Hem Steps
You want a hem that looks neat but doesn’t add bulk. A narrow machined hem works great for lightweight fabrics like silk or cotton. You can use this hem for blouses, skirts, or scarves. Here’s how you do it:
Measure the hem allowance. Most narrow hems use about 1/4 inch.
Fold the edge of your fabric toward the inside by 1/4 inch. Press with an iron.
Fold it again by another 1/4 inch. Press to keep the fold crisp.
Pin the hem in place. Make sure the edge stays even.
Sew close to the inner folded edge using a straight stitch.
Remove pins as you sew. Go slow so your stitches stay straight.
Press the finished hem for a smooth look.
Tip: Use a fine needle and matching thread for delicate fabrics. This helps your hem look professional.
A narrow machined hem keeps your garment light and helps prevent fraying. You get a tidy finish that feels soft and looks clean.
Roll Hem Steps
A roll hem gives your garment a tiny, rolled edge. You see this hem on scarves, dresses, and sheer fabrics. You can use a special roll hem foot on your sewing machine or do it by hand. Here’s a simple way to sew a roll hem:
Fold the raw edge of your fabric to the inside by about 1/8 inch.
Fold it again by another 1/8 inch. Press each fold with an iron.
Pin the hem if needed, but keep the pins small.
Sew close to the folded edge with a straight stitch or narrow zigzag.
Guide the fabric gently so the edge rolls as you sew.
Press the hem when you finish.
Note: Roll hems work best on lightweight fabrics. If you use a roll hem foot, let the foot curl the fabric for you.
You get a hem that looks almost invisible. Your garment feels light and moves easily.
Sweater/Cardigan/Hoodie Hem Tips
Knits and sweaters need special care when you hem them. You want to keep the stretch and shape so your garment lasts. Here are some tips to help you:
Avoid hanging cardigans on regular hangers. This can stretch the shoulders.
Do not overwash or use hot water. Hot water loosens fibers and makes hems sag.
Always follow care labels. Different materials need different care.
Limit carrying heavy bags while wearing knitwear. Heavy bags cause sagging.
Hand wash or use a gentle cycle with lukewarm water and mild detergent.
Rinse carefully with cool water. This keeps fibers strong.
Never wring out sweaters. Press towels against the garment to remove water.
Dry flat and reshape your sweater or hoodie. Air dry away from sunlight.
Tip: When you hem knits, use a stretch stitch or a twin needle. This helps the hem move with the fabric and keeps it from popping.
If you follow these tips, your sweaters, cardigans, and hoodies will keep their shape and feel comfortable. You get a hem that looks good and lasts longer.
You’ve learned how the right hem can change your whole project. When you match hemming techniques to your fabric and garment, you get clothes that look sharp and last longer. Don’t be afraid to try new styles or mix things up. Every time you experiment, you discover something new about sewing.
Ready to level up your skills? Share your favorite hemming techniques with friends or online. You might inspire someone else to get creative, too!
FAQ
What hem works best for stretchy fabrics?
You want a hem that moves with your fabric. Try a twin needle hem or a zigzag stitch. These options keep your garment flexible and prevent the stitches from popping when you wear it.
How do I stop my hem from puckering?
Press your hem flat before sewing. Use the right needle and thread for your fabric. Sew slowly and keep your stitches even. If you see puckers, loosen your thread tension a little.
Can I hem pants without a sewing machine?
Yes, you can! Use a needle and thread to hand-stitch the hem. Try a slip stitch for a neat finish. You only need a few basic tools and some patience.
What is a blind hem?
A blind hem hides the stitches on the outside of your garment. You use a special stitch or foot on your machine. This hem looks clean and professional, perfect for dress pants or skirts.
Which hem should I use for sheer fabrics?
Rolled hems work best for sheer fabrics like chiffon or organza. You get a tiny, neat edge that looks almost invisible. Use a rolled hem foot or sew by hand for delicate results.
Why does my hem fray after washing?
Some fabrics fray more than others. If you see fraying, finish the raw edge with a zigzag stitch or a serger. You can also use fray check liquid to seal the edge and keep it tidy.
How do I choose the right hem for my project?
Think about your fabric, garment style, and how you want it to look. Use double fold hems for sturdy clothes, rolled hems for light fabrics, and bound hems for extra strength. Test on a scrap first!