Picture your favorite sweater. Maybe you love a classic look or want a bold twist. You get to choose every detail, from the neckline to the placket. Everyone can join in, no matter your skill level. Sweater projects let you play with color, texture, and shape. Wondering how do I design a custom cardigan with placket options? Unique placket and neckline choices help your sweater stand out. Sweater making feels fun and personal. Imagine how your next sweater could look with your own design.
Key Takeaways
Begin with a clear idea for your cardigan. Think about the neckline and placket choices that show your style.
Use simple sketches to see your design. Drawing helps you try out different shapes and details before you start knitting.
Pick a neckline that matches your style. Choices like round, V-neck, or boat neck can change how your cardigan looks.
Plan where you want your placket to go. The placket can be straight, curved, or uneven, which affects how it works and looks.
Choose the best yarn and materials. The thickness and type of yarn change how strong and nice your placket will be.
Make your placket stronger. Use interfacing and tough stitches so it lasts a long time.
Try out special details. Adding pockets, bright buttons, or decorations can make your cardigan unique.
Take care of your finished cardigan. Good blocking and care help your placket stay neat and look nice.
How Do I Design a Custom Cardigan with Placket Options?
So, you want to make a sweater that feels like it was made just for you. You might ask, how do i design a custom cardigan with placket options? Let’s break it down step by step. You will start with a clear vision. You will think about the neckline, the placket, and all the little details that make your cardigan special. This is your chance to get creative and try new ideas.
Visualizing with Flat Sketches
You might wonder, how do i design a custom cardigan with placket options? The answer starts with a sketch. Flat sketches help you see your ideas before you pick up your yarn. You can use pencil and paper, or try digital tools if you like working on a computer. Digital sketches let you change things fast and keep your lines neat.
Here’s a simple table to help you plan your sketch:
Method/Step | Description |
|---|---|
Use Digital Tools | Try drawing on a tablet or computer. You can move things around and fix mistakes easily. |
Outline the Basic Silhouette | Draw the shape of your cardigan. Make sure the sides match and the neckline looks even. |
Add Structural Details | Show where the seams, buttons, or zippers will go. Mark the placket and neckline clearly. |
Include Design Elements | Add pockets, cuffs, or special sleeves. Try different neckline shapes to see what you like. |
Apply Colors, Textures, Patterns | Fill in your sketch with colors or patterns. This helps you picture the finished cardigan. |
Final Touches | Draw stitch lines and fabric details. Make your sketch as clear as possible. |
Tip: Try sketching a few different necklines. You might like a round neckline, a V-neck, or something new. Sketching helps you decide before you start knitting.
Choosing Neckline Styles
The neckline is one of the first things people notice. You might ask yourself, how do i design a custom cardigan with placket options? Start by thinking about the neckline you want. Do you like a classic round neckline? Maybe you want a deep V-neck for a modern look. Some people like a high neckline for extra warmth. Others want a wide neckline that feels relaxed.
Here are some ideas to help you choose:
Round neckline: Soft and simple. Works well for most people.
V-neck: Makes your neck look longer. Great for layering.
Boat neckline: Sits wide on your shoulders. Feels breezy and open.
Collared neckline: Adds a touch of style. Looks sharp and neat.
Scoop neckline: Dips lower in the front. Feels casual and easy.
Try drawing each neckline on your sketch. See which one feels right for your design. Remember, the neckline will change how your placket looks and works. If you want buttons, think about how they will line up with your neckline. If you want a zipper, make sure the neckline shape fits the zipper style.
Planning Placket Placement
Now, let’s talk about the placket. You might still wonder, how do i design a custom cardigan with placket options? The placket is the part that holds your buttons or zipper. It can be straight, curved, or even off to one side. You need to plan where it goes before you start knitting.
Here’s a table to help you think about placket placement:
Factor | Description |
|---|---|
Type of stitch | Choose a stitch that looks good and holds up well. This makes your placket strong and neat. |
Method of attachment | Knit the placket right onto the body. This keeps it from stretching or sagging over time. |
Overall finish | Aim for a smooth, seamless look. A clean finish makes your cardigan look professional. |
Note: The neckline and placket work together. If you pick a V-neck, your placket will follow the V shape. If you choose a round neckline, the placket will curve with it. Always plan both at the same time.
When you ask, how do i design a custom cardigan with placket options?, remember to think about the neckline and placket together. Try different sketches. Play with shapes and placements. You will find a style that feels just right for you.
You can make your cardigan as simple or as bold as you want. The neckline and placket are your canvas. Have fun and let your ideas shine!
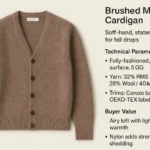
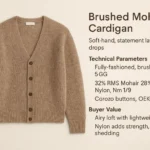
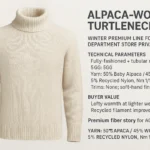
Selecting Yarn and Materials
Choosing the right yarn and materials can make or break your cardigan. The yarn, needles, and extra support you use all play a big part in how your placket looks and feels. Let’s break down what you need to know before you start your design.
Yarn Weight and Fiber
Yarn weight and fiber matter a lot when you want a sturdy placket. Some yarns feel soft and light, while others feel thick and heavy. Each type changes how your cardigan holds up over time.
Heavier yarns show mistakes more easily. You need to work carefully so your placket stays neat.
Thick yarn puts more pressure on seams. If you use chunky yarn, shape your panels well and join them tightly to stop sagging.
Different fibers change the look and feel. Wool feels warm and springy. Cotton feels cool and smooth. Acrylic lasts a long time and comes in many colors.
Tip: Pick a yarn that matches your skill level and the look you want. If you’re new, try a medium-weight yarn. It’s easier to handle and gives good results.
Needles and Notions
The tools you use help your placket stay strong and look sharp. You want your closures to last, even if you open and close them a lot.
Use sturdy needles that fit your yarn. The right size helps your stitches stay even.
Fastening notions like buttons, snaps, and zippers matter most at the placket. They keep your cardigan closed and hold up to lots of use.
Zippers and snaps work well for spots that get pulled or stretched. They spread out the pressure and stop the fabric from tearing.
Buttons and hooks help keep overlapping edges in place. They make sure your cardigan fits well.
Use strong thread for sewing on closures. Double-stitch for extra hold.
Note: Always test your closures before finishing. Make sure they open and close smoothly and feel secure.
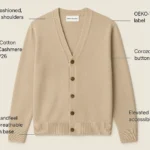
Interfacing and Reinforcement Materials
Interfacing gives your placket extra support. It acts like a hidden helper, keeping everything in shape.
Interfacing is an extra layer you add to fabric. It helps parts like plackets and collars stay firm and hold their shape.
Add interfacing to collars, cuffs, button plackets, and waistbands for more strength.
Reinforce high-stress spots, like where you sew on buttons or make buttonholes.
For light fabrics like rayon or thin cotton, use a soft, flexible interfacing. This keeps the placket from feeling stiff.
Match the interfacing weight to your knit. Use lightweight interfacing for soft knits and medium-weight for thicker knits.
If you want your cardigan to look polished and last a long time, don’t skip this step. A little extra support goes a long way!
Exploring Placket and Neckline Options

Button Bands
Button bands are a classic choice when you want your sweater to look neat and timeless. You see them on many cardigans, from school uniforms to dressy outfits. Button bands work well with almost any neckline. You can match them with a round neckline for a soft look or a V-neckline for a sharper style.
Here’s why you might pick button bands:
You get a polished finish that looks great for work or special events.
Button bands let you play with different button shapes and colors. This gives you lots of options to show off your style.
You can open or close your sweater as much as you want. Leave a few buttons undone for a relaxed feel.
But button bands have a few things to watch out for. Sometimes, the spaces between buttons let in a little breeze. You might also need to sew buttons back on if they get loose. Still, button bands stay popular because they look good and feel familiar.
Tip: Try matching your button band to your neckline shape. A V-neckline with a button band gives a classic, flattering look.
Zippered Plackets
Zippered plackets give your sweater a sporty, modern vibe. You zip up and go—no fussing with buttons. Zippers work best with straight or slightly curved necklines. They close tightly, so you stay warm even on chilly days.
Let’s look at some reasons to choose a zippered placket:
Zippers keep out the wind. You won’t feel drafts between closures.
You get a smooth, flat front. This looks sleek and feels comfortable.
Zippers make your sweater easy to put on and take off.
There are a few things to think about, though. Zippers can break or get stuck after lots of use. If that happens, you might need to replace the zipper. Zippered plackets also look more casual, so they fit best with relaxed or sporty outfits.
Note: If you want a zipper, pick a neckline that matches the zipper’s shape. A round neckline works well with a short zipper, while a V-neckline fits a longer zipper.
Overlapping and Asymmetrical Plackets
If you want something different, try overlapping or asymmetrical plackets. These options let you play with shapes and lines. You can make your sweater stand out with a diagonal closure or a double-layered front.
Here are some fun ways to use these styles:
Overlapping plackets work well with high necklines. They keep you cozy and add a twist to your look.
Asymmetrical plackets look bold with slanted or off-center necklines. You can create a modern, eye-catching design.
Try mixing textures or colors on each side of the placket for extra flair.
These options give you lots of room to experiment. You can match the placket to any neckline you like. Just remember to plan your closure carefully so it stays neat and comfortable.
Tip: Sketch your ideas first. Try different neckline shapes with overlapping or asymmetrical plackets. You might discover a new favorite style!
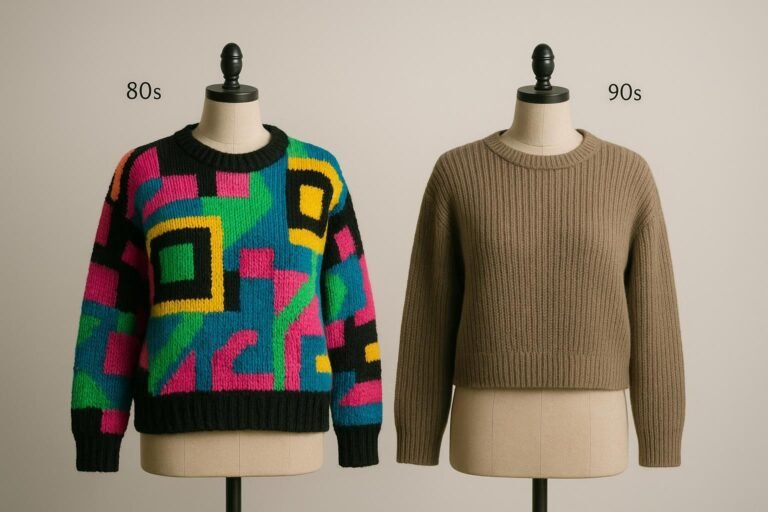
Round Neck vs. V-Neck
When you design your custom cardigan, the neckline sets the mood for the whole sweater. You might wonder which neckline works best for your style and comfort. Let’s look at the round neck and V-neck options. Each neckline brings something special to your cardigan.
A round neck gives you a classic look. You see this neckline on many sweaters in stores. It sits close to your neck and feels cozy. If you want a cardigan that works for school, work, or relaxing at home, the round neck fits almost any occasion. You can pair it with button bands for a timeless finish. Zippered plackets also look neat with a round neckline, especially if you want a sporty vibe.
A V-neck changes the feel of your cardigan. This neckline opens up the front and makes your neck look longer. You get a modern touch that works well for layering. If you like wearing shirts or tees under your sweater, the V-neck gives you more room. Button bands follow the V shape and create a sharp line down the front. Zippers work too, but you need to match the angle of the neckline to the zipper for a smooth look.
Let’s compare the two necklines in a simple table:
Neckline | Style | Best Placket Match | Layering | Comfort |
|---|---|---|---|---|
Round Neck | Classic, neat | Button band, zipper | Easy | Cozy, snug |
V-Neck | Modern, sharp | Button band, zipper | Great | Open, airy |
Tip: Try sketching both necklines on your design. You might find that one neckline suits your face shape or style better.
You can also play with overlapping or asymmetrical plackets. These work with both necklines, but you need to plan the shape carefully. An overlapping placket on a round neckline looks soft and unique. On a V-neck, it adds drama and draws the eye.
When you choose your neckline, think about how you want your cardigan to fit and feel. Do you want warmth around your neck? Go for a round neckline. Do you want a sweater that shows off your shirt or necklace? Pick a V-neck. Both necklines let you experiment with placket styles, colors, and closures.
You get to decide what feels right for you. Your neckline choice helps your cardigan stand out and match your personality. Have fun mixing and matching placket options with your favorite neckline. Your custom cardigan will look and feel just the way you want!
Placket Construction

Picking Up Stitches
You want your cardigan to look neat and professional. Picking up stitches along the edge is a key step. If you do this well, your placket will sit flat and look even. Here’s how you can get a clean edge every time:
Determine the Ratio: For stockinette stitch, pick up 3 stitches for every 4 rows. For garter stitch, use a 1-to-2 ratio.
Insert the Needle Correctly: Slide your needle under both strands of the edge stitch. This makes your edge strong.
Consider Edge Stitches: Check if your pattern tells you to slip edge stitches. This changes how many stitches you pick up.
Handle Curves and Decreases: On diagonal edges, pick up 4 stitches for every 5 rows. This keeps the edge smooth.
Use Removable Stitch Markers: Divide the edge into quarters with markers. This helps you spread stitches evenly.
Adjust as Necessary: If you have too many or too few stitches, add or decrease on the first row. This fixes the count.
Don’t pick up stitches in big gaps, especially at corners or steps.
If your edge looks messy, pull it out and try again. It’s worth the extra time.
These small details make your cardigan look polished.
Tip: Take your time with this step. A neat edge makes your whole sweater look better.
Reinforcing the Placket
You want your placket to last. Reinforcing it helps keep the shape and stops stretching. You can use a few tricks to make it strong:
Add a strip of lightweight interfacing to the wrong side before you sew on buttons or a zipper.
Use a crochet hook to work a slip stitch along the edge. This gives extra support.
Sew a ribbon or twill tape behind the button band. This keeps the edge from sagging.
Double up your yarn for the first row of the placket. This adds thickness and strength.
Note: Reinforcing is important if you use heavy buttons or a long zipper. It helps your cardigan hold up over time.
Edge Finishes (Rib, Garter, I-Cord)
You can choose from different edge finishes to give your cardigan a unique look. Each finish changes the style and feel of your sweater.
Edge Finish | Look | Best For | How to Work It |
|---|---|---|---|
Rib | Stretchy | Button bands, cuffs | Knit 1×1 or 2×2 ribbing |
Garter | Flat, simple | Casual cardigans | Knit every row |
I-Cord | Sleek, tidy | Modern, neat edges | Knit a narrow tube along edge |
Ribbing gives a stretchy edge that hugs the body.
Garter stitch feels soft and lays flat.
I-Cord makes a smooth, rounded border.
Tip: Try a small swatch before you finish your cardigan. You can see which edge you like best.
You have many choices for placket construction. Take your time with each step. Your cardigan will look and feel just the way you want.
Attaching Closures
You have finished your placket. Now you need to add closures. Closures keep your cardigan fastened and help it fit well. You can choose buttons, zippers, snaps, or hooks. Each type gives your sweater a different look and feel.
Buttons
Buttons are the most popular choice. You can find them in many shapes, sizes, and colors. To attach buttons, follow these steps:
Mark the button placement with pins or chalk. Space them evenly along the placket.
Sew each button with strong thread. Go through the holes several times.
Make sure the buttons sit flat. They should not wobble or twist.
Test the buttonholes. Slide each button through to check the fit.
Tip: Use a toothpick or small stick under the button while sewing. This leaves a little space for the button to move, making it easier to fasten.
Zippers
Zippers give your cardigan a modern look. They close tightly and keep out the wind. Here’s how you can attach a zipper:
Pin the zipper in place along the placket edge.
Use a sewing machine or hand stitch to sew the zipper tape to the knit fabric.
Check that the zipper opens and closes smoothly.
Hide the zipper ends inside the placket for a neat finish.
Closure Type | Best For | How to Attach | Look/Feel |
|---|---|---|---|
Buttons | Classic cardigans | Sew with thread | Traditional, cozy |
Zippers | Sporty styles | Machine or hand sew | Sleek, modern |
Snaps | Lightweight knits | Sew or press into fabric | Simple, quick |
Hooks | Delicate designs | Sew onto edge | Subtle, elegant |
Snaps and Hooks
Snaps and hooks work well for lightweight or delicate cardigans. You can sew them on by hand. Place them at the top, middle, or bottom of the placket. Make sure they line up so your sweater closes evenly.
Note: Always test your closures before finishing. Open and close each one a few times. If anything feels loose, add extra stitches.
You can mix closures for a unique look. Try buttons at the top and a zipper at the bottom. You might use snaps for a hidden closure. Your choices help your cardigan stand out.
Take your time with this step. Neat closures make your sweater look professional. You will feel proud every time you wear it!
Customizing Fit and Features
Adjusting Placket Width
You want your cardigan to look just right on you. Placket width can change the whole style and fit. If you like a bold look, try a wide placket. For a softer style, go with a narrow one. You can measure your favorite sweater and use that as a guide. Wide plackets work well with chunky yarn and big buttons. Narrow plackets feel light and neat, perfect for smaller closures.
Here’s a quick way to test placket width:
Knit a small swatch with your chosen yarn.
Try different widths, like 1 inch, 1.5 inches, or 2 inches.
Hold the swatch up to your body and see which fit you like best.
Tip: If you want your cardigan to stay closed and not gap, make sure your placket is wide enough for your buttons or zipper.
Modifying for Body Shape
Everyone’s body is different. You can change your cardigan to fit you perfectly. If you have broad shoulders, add a few stitches to the upper body. If you want a closer fit at the waist, decrease stitches as you knit down. You can also shape the sleeves to fit your arms better.
Here’s a simple table to help you match fit adjustments to body areas:
Body Area | How to Adjust | Result |
|---|---|---|
Shoulders | Add stitches | More room to move |
Waist | Decrease stitches | Snug, shaped fit |
Hips | Increase stitches | Comfortable fit |
Sleeves | Change stitch count | Custom sleeve fit |
You can try on your cardigan as you go. If it feels too tight or too loose, change the stitch count. You control the fit, so make it work for you.
Adding Unique Details
You can make your cardigan stand out with special touches. Try adding pockets for your phone or keys. Use colorful buttons or a fun zipper. You can knit a stripe or add a patch. Embroidery or appliqué gives your sweater a personal look.
Here are some ideas to spark your creativity:
Knit a contrast color placket for a pop of style.
Sew on decorative patches or badges.
Add a hidden pocket inside the placket.
Use fancy buttons, like wood or metal shapes.
Try a scalloped edge or a ruffled trim.
Note: Unique details help your cardigan show off your personality. You get a custom fit and a one-of-a-kind look.
You can mix and match these features. Try something new each time you make a sweater. You will learn what fit and style you like best. Your cardigan will feel special every time you wear it.
Finishing and Professional Tips
Blocking and Pressing
Blocking and pressing help your sweater look smooth and even. When you finish your knit project, soak it in cool water for about 20 minutes. Gently squeeze out the water. Lay your cardigan flat on a towel and shape it with your hands. Make sure the placket edges line up and the neckline sits flat. Let it dry completely before you move it.
Pressing gives your placket a crisp, professional edge. Use a steam iron on low heat. Hold the iron just above the fabric and let the steam relax the stitches. Do not press down hard. If you want sharp edges, press the placket pieces before you sew them together. This step helps you get a neat finish and makes sewing easier.
Tip: Always test your iron on a small swatch first. Some yarns can melt or flatten if the heat is too high.
Weaving in Ends
Weaving in ends keeps your sweater tidy and strong. You want to hide the yarn tails so they do not show or come loose. Here are some ways to weave in ends for a neat look:
Weave in ends diagonally to help secure them.
Use duplicate stitch if both sides of the placket will show.
Hide ends in seams or less visible spots.
Change direction while weaving to keep ends from slipping out.
Wash and block your cardigan after weaving. This helps lock the ends in place.
If you join a new ball of yarn, do it at the edge of a seam. For pieces you knit in the round, join yarn in a spot that will not show. Weave the yarn horizontally under every other stitch leg for the best result.
Note: Take your time with this step. A well-woven end will not poke out or unravel later.
Maintaining Structure
You want your placket to keep its shape, even after many wears and washes. Try these steps for a strong, lasting finish:
Interface only one side of your placket. This gives support without making it bulky.
Pre-press your placket pieces before sewing. You get crisp, even edges.
Use a glue stick or Wonder Tape to hold the edges in place. This helps you sew straight and neat lines.
A good structure means your cardigan will look great every time you wear it. These small steps make a big difference in how your knit project holds up.
Remember: A little extra care at the end makes your sweater look store-bought!
Troubleshooting Common Issues
Even the best cardigan projects can run into a few bumps. Don’t worry! You can fix most problems with a few simple tricks. Let’s look at some common placket issues and how you can solve them.
Fixing Wavy or Stretched Plackets
A wavy or stretched placket can make your cardigan look messy. This often happens if you pick up too many stitches or use a yarn that stretches a lot. You might also see this problem if you hang your sweater instead of folding it.
Here’s what you can do:
Check your stitch count. If the placket ripples, you probably picked up too many stitches. Try picking up fewer next time.
Use the right yarn. Some yarns stretch more than others. Choose a yarn that holds its shape for plackets.
Block your cardigan. Wet the sweater, gently squeeze out water, and lay it flat to dry. Shape the placket with your hands while it dries.
Store folded, not hung. Hanging can stretch the shoulders and placket. Fold your cardigan and keep it on a shelf or in a drawer.
Tip: If your placket still looks wavy, you can sew a ribbon or twill tape to the inside for extra support.
Even Buttonholes and Closures
Uneven buttonholes can make your cardigan look crooked or cause it to gap. You want your closures to line up and stay neat. Here’s how you can get even buttonholes every time:
Knit 1, purl 1 across the row for a balanced edge.
Work stitches as they appear. When making buttonholes, use yarn over, purl 2, and knit 2 together as needed.
Repeat the knit and purl pattern for the next rows to keep the fabric even.
Bind off all stitches to finish the buttonholes.
Make buttonholes a bit smaller than you think you need. They stretch with use.
Place buttonholes at least three stitches away from the edge for a tidy look.
Match the top buttonhole to your neckline style. This keeps the cardigan balanced.
Choose button size based on your yarn weight. Heavier yarns need bigger buttons and fewer buttonholes.
Note: Always test your buttonholes with your chosen buttons before sewing them on.
Preventing Placket Distortion
Placket distortion can happen during wear or washing. You want your cardigan to keep its shape for a long time. Here are some easy ways to prevent stretching and sagging:
Wash by hand or use a gentle cycle with cold water. Hot water and rough cycles can stretch the fibers.
Never wring or twist your sweater. Instead, roll it in a towel to press out water.
Lay your cardigan flat to dry. This keeps the placket from stretching under its own weight.
Fold your sweater for storage. Hanging can pull the placket and shoulders out of shape.
Use padded hangers if you must hang your cardigan. These help prevent shoulder bumps.
Do This | Avoid This |
|---|---|
Hand wash or gentle cycle | Machine wash on heavy cycle |
Cold or lukewarm water | Hot water |
Lay flat to dry | Hang to dry |
Fold for storage | Hang on thin hangers |
Remember: Taking care of your cardigan helps it look great and last longer. A little extra attention goes a long way!
You can use different placket styles and neckline shapes. This makes your cardigan special and unique. Try new buttons for a fresh look. Add your own label to show it is yours. Use up to four colors for a bold style. Practice will help you get better each time. Share your finished sweaters with friends. This helps you make new friends and get new ideas. Here are some places to find help and inspiration:
Resource | Description |
|---|---|
Craftsy | Classes for custom sweaters and expert advice |
Creativebug | Vintage-style cardigan tutorials |
Knitting Magazines | Design inspiration and step-by-step guides |
Come back to this guide when you start a new sweater. You will get more creative with every cardigan you make!
FAQ
How do I choose the best placket style for my cardigan?
Think about your favorite sweaters. Do you like buttons, zippers, or something different? Try sketching a few options. Pick the one that matches your style and feels easy to use.
Can I add a placket to a cardigan pattern that doesn’t have one?
Yes! You can pick up stitches along the edge and knit a placket. Make sure you match the stitch pattern and keep your edges neat. This gives your cardigan a custom touch.
What yarn works best for sturdy plackets?
Medium-weight wool or wool blends work well. These yarns hold their shape and feel soft. Avoid very stretchy or slippery yarns for plackets. They can sag or lose shape over time.
How do I keep my buttonholes from stretching out?
Sew a ribbon or twill tape behind the button band. This helps support the buttonholes. You can also use smaller buttons or tighter stitches for extra strength.
Can I mix different placket styles in one cardigan?
Absolutely! You can use buttons at the top and a zipper at the bottom. Try snaps or hooks for hidden closures. Mixing styles gives your cardigan a unique look.
What if my placket looks uneven after finishing?
Don’t worry! Block your cardigan to help even out the edges. If it still looks off, you can carefully redo the placket. Practice helps you get better each time.
Do I need special tools to sew on zippers or buttons?
You only need a needle, strong thread, and scissors. For zippers, a sewing machine makes things faster, but you can sew by hand. Use pins or clips to hold everything in place.