You might wonder how the knitwear sampling process works. You begin by making a swatch. This step is important for your whole project. When you knit the sample, you see your ideas in yarn. You also check if the quality is good. If the texture or gauge feels wrong, you knit the sample again. The designer and knitter talk to each other about every sample. This helps keep the quality high. You do these steps again and again. You stop when the sample fits your design goals. You get final approval by focusing on quality and following each step. When you knit your sample, you check quality at every stage. The knitwear sampling process shows how the process works. You knit the sample, look at it, and make changes. You do this until you get final approval. This way, every knitwear sample is good quality. It also helps your design process. How does the knitwear sampling process work? You knit your sample, talk with others, and check quality at every step.
Key Takeaways
Begin by making a swatch to test yarn and gauge. This step helps you find mistakes early. It also makes sure your project will fit well.
Check the texture and gauge after you knit your swatch. Good measurements help you make better knitwear in the end.
Talk clearly with your sample knitter. Give updates and feedback often. This helps keep the quality high and stops mistakes.
Pick the right yarn by looking at fiber type and weight. The yarn you choose changes how your knitwear looks and feels.
Plan your sample with care. Think about size, shape, and design parts. Good planning stops mistakes and gives better results.
Look at your knitwear sample for any problems before making more. Checking it well makes sure your final product looks great and is high quality.
Change things if the fit is not right. Write down any changes you make. This keeps your pattern up to date and matches your design goals.
Use quality control at every step. Checking often helps keep your knitwear good during the whole sampling process.
Swatching In The Knitwear Sampling Process
Swatching stands as the essential first step in the knitwear sampling process. You use this step to set the foundation for your entire project. Swatching helps you understand how your yarn behaves and ensures your final knitwear will fit and look as you expect. If you want to achieve high quality in your sample, you must pay close attention to this stage. The knitwear sampling process always begins with a swatch because it gives you a preview of the fabric, texture, and gauge. This step helps you avoid mistakes later and keeps the quality of your knitwear high.
Creating A Swatch
You start the knitwear sampling process by making a swatch. This small piece of knitwear lets you test your yarn and pattern before you knit the full sample. Swatching is crucial for successful garment knitting because it allows you to see the yarn’s characteristics and check if the final garment will fit correctly. To create a swatch, follow these steps:
Decide on the size of your swatch. Most knitters choose a square between 6 and 8 inches.
Calculate the number of stitches you need based on the pattern’s gauge.
Cast on loosely. Use a stretchy cast-on method to avoid tight edges.
Knit the swatch in the stitch pattern you plan to use for your sample. Continue until you reach the required length.
Bind off loosely. Measure the raw gauge before blocking.
Tip: Make a large swatch to avoid edge stitch distortion. This helps you get a more accurate reading of your gauge.
You should always use the same yarn and needles for your swatch as you plan to use in your knitwear sample. This step ensures the quality of your sample and helps you avoid surprises later in the process.
Evaluating Texture And Gauge
After you finish knitting your swatch, you need to evaluate its texture and gauge. This step is important in the knitwear sampling process because it tells you if your sample matches your design goals. You want your knitwear to feel and look right, so you must check both the texture and the gauge.
Swatching is essential for accurate gauge and fit.
Use the same yarn and needles as your project for swatching.
Make swatches 6-8 inches square for accurate readings.
Block your swatch before measuring to account for shrinkage.
Knit swatches in the same method (flat or round) as your project to ensure accuracy.
You measure the gauge by counting the number of stitches and rows in a 4-inch square. Wet block your swatch to see how the yarn changes after washing. This step helps you get the most accurate gauge for your knitwear sample. If the texture feels rough or the gauge is off, you may need to adjust your process before moving forward.
Adjusting Pattern Or Yarn
Sometimes your swatch does not match the pattern’s gauge or the texture does not feel right. In the knitwear sampling process, you must adjust either your pattern or your yarn to achieve the best quality. Here is how you can make adjustments:
Measure the stitch and row gauge after blocking your swatch.
If your blocked gauge is larger than the pattern designer’s gauge, use a smaller needle size.
If your blocked gauge is smaller than the pattern designer’s gauge, use a larger needle size.
If changing the needle size does not help, you may need to try a different yarn. The goal is to make sure your knitwear sample meets your design’s quality standards. You want your sample to look and feel just right before you move on to the next step in the process.
Note: Always check your swatch after blocking. Yarn can change a lot after washing, and this can affect the quality of your final knitwear.
By following these steps, you set yourself up for success in the knitwear sampling process. Swatching helps you catch problems early and ensures your sample meets your expectations for quality and fit.
Planning The Sample
Planning your knitwear sample is very important. You need to think about size, shape, and design. You also need to talk clearly with others. Good planning helps you avoid mistakes. It makes sure your sample fits well and looks good.
Defining Size And Shape
First, you decide the size and shape of your sample. This helps you make a pattern draft that matches your idea. You need to think about a few things. The table below shows what to consider:
Factor | Description |
|---|---|
Ease | This is the difference between the garment and body. It changes how the garment fits and hangs. |
Garment Length | This tells you how the garment will look on the body. It also affects the shape. |
Weight of the Yarn | Heavy yarn stretches more. This changes how your design fits. |
Overall Fit | Do you want your sample tight or loose? This changes the size and shape. |
You also need to measure the shoulder width. Use the cross-shoulder width of the body. Add shaping between the underarm and shoulder. This helps you get the right width. Change the neck depth and width for the yarn’s weight. These steps help you make a good pattern draft.
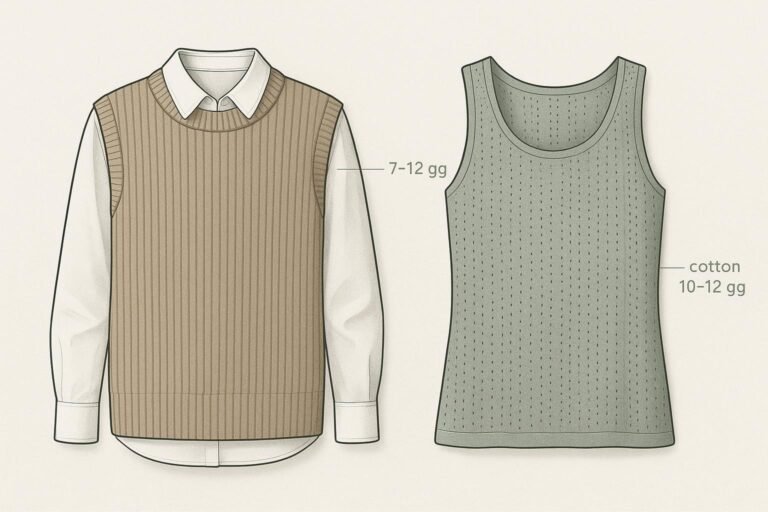
Adding Design Elements
Design elements make your sample special. Use your pattern draft to plan these features. Research helps you see what is popular. It also helps you know what people want. This research helps you choose your design.
Work with technicians to make sure your design works with the machines.
The knitting pattern details can change how long your sample takes.
If your design does not work with the machines, change your pattern draft or pick a new one.
Each design element can change the quality and time needed for your sample. Careful planning helps you reach your goals.
Designer-Knitter Communication
Talking well with your sample knitter is very important. You need to share updates and feedback often. This helps you find problems early. It keeps your sample moving forward.
Ask your knitter to send updates and photos. This helps you see the progress.
Tell your knitter to ask questions about the pattern. This shows they want to follow your draft.
Listen to your knitter’s feedback. They use your pattern first and can find problems before you finish.
Clear communication helps you keep quality high. It also helps you avoid delays. Careful planning helps you get a sample that matches your pattern and design.
Yarn Selection And Preparation
Choosing Yarn For Knitwear
You start the knitwear sampling process by choosing the right yarn. Yarn selection shapes the look, feel, and durability of your knitwear. You need to think about fiber composition, yarn weight, texture, color, and client needs. Wool and cotton give softness and breathability. Synthetic fibers offer durability and easy care. Yarn weight changes the fabric’s drape. Light yarns make soft, flowing knitwear. Heavy yarns create dense, warm garments. The construction of the yarn matters too. Plied yarns are stronger than single-ply. You also need to check warmth, elasticity, and care requirements. These details help you keep the quality of your sample high. When you match the yarn to your pattern draft, you set the foundation for a successful knitwear sampling process.
Testing And Sourcing Yarn
You test and source yarn before you knit your sample. This step helps you see how the yarn works with your knitting pattern and pattern draft. Many designers knit all samples themselves. You keep the finished pieces for reference. You also use test knitters to get feedback. This feedback improves your draft and helps you build a community. Sample knitting is a key part of the knitwear sampling process. You gather feedback from testers to improve the sample and the pattern draft. Swatches give you clues, but the final knitwear will look different. You may need to change your technique after seeing the sample. You can use platforms like yarnbank® to find yarn suppliers. You search for yarns by fiber type and sustainability. Digital yarn data helps you simulate the knitwear before making a physical sample. This process saves time and helps you make better choices for your draft.
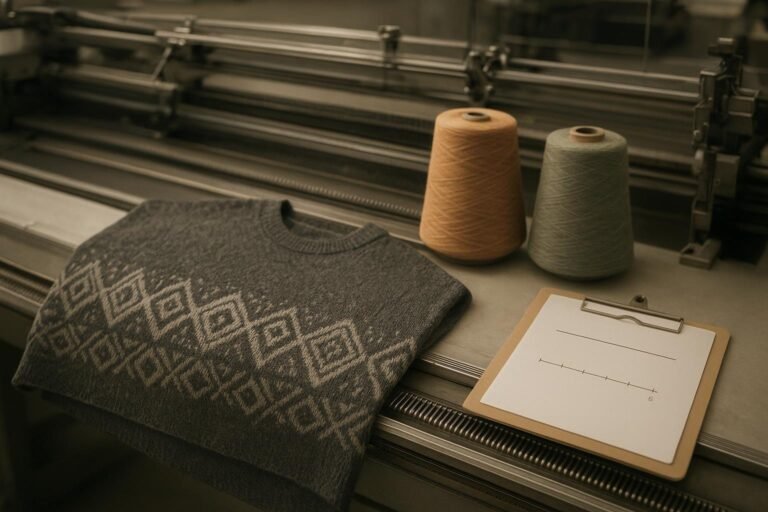
Preparing Yarn For Sample Knitting
You prepare yarn for sample knitting to keep the quality consistent. You decide if you want to pick the knitting pattern first and spin for it, or make the yarn and then find the perfect pattern draft. You acquire the fiber and prep it for spinning. You plan the yarn and make control samples. You create a mini-skein for testing. You spin the project yarn and check it against the control sample. You knit the pattern draft and compare the results.
Spin for a while, then pull off a length of yarn and hang an orifice hook in the middle. The hook’s weight twists the yarn. If you like the 2-ply result, cut the sample off and set it aside for reference.
You use a yarn swift to secure the skein. This keeps the winding even and prevents tangling. You use a ball winder for neat, center-pull balls. You keep tension steady while winding to avoid unevenness. These steps help you maintain the quality of your knitwear sample. You make sure the yarn matches your pattern draft and knitting pattern. This careful preparation supports the knitwear sampling process and helps you achieve professional results.
Sample Knitting Techniques
Hand Vs. Machine Sample Knitting
You can make a knitwear sample by hand or with a machine. Each way gives you different results. Hand knitting lets you control every stitch. You can add special touches and try new ideas. Machine knitting is faster. It helps you make more samples quickly. You should know the differences before you pick a method for your knitwear sampling process.
Here is a table to compare hand and machine sample knitting:
Aspect | Hand Knitting | Machine Knitting |
|---|---|---|
Cast On | Many ways, like long tail cast on | Latch tool cast on, similar to hand methods |
Cast Off | Slip one stitch over another | Chain stitch-type bind-off with a latch tool |
Decreasing Stitches | Harder, needs manual matching | Easier to match left and right leaning stitches |
Yarn Over | Manual, can be tricky | Use transfer tool for easier yarn overs |
Waste Yarn | Not used much, called ‘scrap yarn’ | Used often, called ‘waste yarn off’ |
Default Fabric | Garter stitch by turning | Stockinet stitch from flat bed knitting |
Reversibility | Garter stitch is reversible | Garter stitch is hard to do on machines |
Hand knitting lets you make reversible fabrics like garter stitch. Machine knitting often makes stockinet stitch, which is not reversible. You may need to change your knitting pattern or draft to fit the method you use. If you want to test a new pattern draft, try both ways to see which gives you better quality.
Tip: Always check your sample when you finish. The method you use can change how your knitwear looks and feels.
Working With Sample Knitters
You might want to work with sample knitters to finish your knitwear sampling process faster. Good sample knitters help you reach your goals and keep your quality high. When you pick a knitter, look for special skills and experience. The right person can follow your knitting pattern and draft carefully.
Here are the most important skills for a sample knitter:
Qualification/Skill | Description |
|---|---|
Precision in knitting | Can knit with accuracy and care. |
Following instructions exactly | Can follow all guidelines given. |
Keen attention to detail | Notices small but important details. |
Consistent meeting of deadlines | Finishes tasks on time every time. |
Effective communication skills | Shares information clearly and easily. |
You want knitters who spot missing abbreviations or mistakes in your knitting pattern. They should give helpful feedback and ask questions about your draft. Reliable sample knitters finish their work on time and help you improve your knitwear sampling process.
They notice details, like missing abbreviations.
They give helpful feedback.
They want to learn and help others.
Note: Good communication helps you fix problems early. Always ask your sample knitter for updates and feedback.
Troubleshooting Issues
You may have problems during the knitwear sampling process. These issues can lower the quality of your sample. You need to know how to fix them to keep your project going.
Common problems and solutions include:
Dropped Stitches: You can fix this by learning to put the dropped stitch back. To avoid it, do not stop in the middle of a row and use stitch stoppers.
Too Many Stitches & Holes: This happens if you make extra yarn overs or double stitches. You can fix it by knitting two stitches together or undoing back to the mistake.
Problems With Gauge: Your knitting may be too tight or too loose. Practice helps, and blocking can make the fabric even.
Knitting in the Wrong Direction: If you knit the wrong way, you need to undo back to the mistake and knit the right way.
🧶 Always check your sample for mistakes before you move to the next step in the knitwear sampling process. Fixing small errors early helps you keep the quality high.
You can avoid many problems by following your knitting pattern and draft closely. Careful sampling helps you find issues before they hurt your final knitwear. If you see a problem, take time to fix it. This keeps your knitwear sampling process smooth and your sample looking good.
Assembly And Finishing
Before you start the knitwear sampling process, you should agree on all finishing work. This step helps you avoid confusion and ensures your sample meets professional standards. You and your team need to set clear agreements about swatches, sample approval, and payment terms. The table below shows important agreements to discuss:
Agreement | Description |
|---|---|
Swatches | The Company provides swatches of the Design before starting the first sample to ensure satisfaction with quality. |
Sample Approval | You must check the first sample before confirming the Purchase Order. |
Payment Terms | The Development Cost for the first sample will be offset upon completion and payment of the Purchase Order. |
Shaping And Seaming
You shape and seam your knitwear to create a polished look. In the knitwear sampling process, shaping and seaming use standard techniques. You often start with blocking the fabric before seaming. This step helps the fabric settle and become even. For side-to-side seams, you use mattress stitch. You align the edges with right sides facing and join them with a tapestry needle. You work through the bars of the stitches for a neat finish. You usually seam the shoulders first, then attach the sleeves, and finally close the side seams. If the edges do not match perfectly, you use top-to-top or top-to-side seaming. Pin basting helps you keep the edges in the right place. After seaming, gentle steaming polishes the seams and gives your knitwear a professional look.
Tip: Always block your knitwear before seaming. This step helps you get an even and tidy finish.
Washing And Blocking
Washing and blocking change how your knitwear sample looks and fits. You wash the sample gently to open up the fibers. Blocking makes the fabric more flexible and lets you shape it. When you block, the stitches even out and the knitwear looks smoother. The fibers bloom, which means they puff up and fill the fabric. This effect depends on the fiber type. You let the sample dry in the shape you want. Washing and blocking help you see the true fit and appearance of your knitwear. You should always block before measuring or finishing your sample in the knitwear sampling process.
The fabric becomes easier to shape and holds its form after drying.
Stitches look more even, making the knitwear sample look better.
Fibers open up and bloom, which improves the texture and feel.
Final Details And Agreement
You finish your knitwear sample by adding final touches. These steps make your sample look professional and ready for approval. You steam and press the garment to remove wrinkles and help it fall correctly. You inspect and trim any loose ends to keep the quality high. You add labels, size tags, and care instructions for branding. You check for any last details that improve the look of your knitwear. These finishing steps are important in the knitwear sampling process. They help you present a sample that matches your knitting pattern and meets your design goals.
Note: Careful finishing shows your attention to detail and helps your knitwear stand out.
By following these steps, you make sure your knitwear sample looks polished and professional. The assembly and finishing stage is a key part of the knitwear sampling process. You shape, seam, wash, block, and add final details to create a sample that meets high standards and is ready for production.
Fitting And Adjustments
Fit Review
You need to check the fit of your knitwear sample before moving forward in the knitwear sampling process. A fit review helps you see if the garment matches your design and fits well on the body. You want your knitwear to look good and feel comfortable. Use these steps to guide your fit review:
Look at the overall appearance and fit of the knitwear on the model or mannequin.
Check for any measurements that do not match your plan. Watch for tight spots, pulling, or loose areas.
Examine the shape of the pattern. Make sure it matches your design.
Ask the person wearing the sample to move around. See if the knitwear allows easy movement.
Write down all comments and notes during the fitting. Include any changes or requests for each part of the garment.
Adjust the sample based on what you see and discuss during the fitting.
Update your records with all the changes you decide to make.
Tip: Always document your fit review. Good notes help you make better adjustments in the knitwear sampling process.
Making Corrections
After your fit review, you may need to make corrections to your knitwear sample. These changes help you reach the right fit and look. You want your sample to match your design and feel comfortable for the wearer. Start by looking at your notes from the fit review. Focus on the areas that need fixing.
If the sleeves are too long, shorten them.
If the body feels tight, add more stitches or use a larger needle.
If the neckline does not sit right, adjust its depth or width.
You may need to unravel part of the knitwear and re-knit it. Sometimes, you only need to change a small section. Always check your work after each correction. This step keeps your knitwear sampling process on track and helps you reach a high-quality sample.
Updating Patterns
Once you finish your corrections, you need to update your pattern. This step is important in the knitwear sampling process. You want your pattern to match the changes you made to the sample. Follow these steps to update your pattern:
Measure your torso length from the high point of your shoulder to your natural waist.
Place the pattern piece on your body to see where you need to adjust.
Check if the waistline and main points of the pattern match your body.
Change the pattern by lengthening or shortening areas as needed.
Test the new pattern by making a mock-up or another sample to see if the fit is right.
Note: Always test your updated pattern before moving to production. This step helps you avoid mistakes and keeps your knitwear sampling process smooth.
By following these steps, you make sure your knitwear sample fits well and looks professional. Careful fitting and adjustments help you reach the best results in the knitwear sampling process.
Final Approval And Production
Quality Control
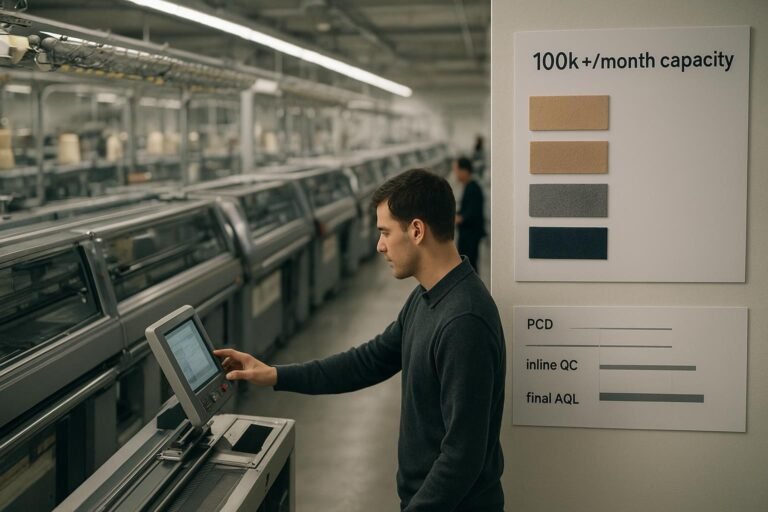
You have to check your knitwear sample carefully before making more. These checks help you find mistakes early. They also keep your knitwear looking good. Quality control happens at many steps in the knitwear sampling process. You want every sample to fit your design and size plans.
Here is a table that lists common quality control checks in the knitwear sampling process:
Quality Control Measure | Description | Responsible Department | Importance |
|---|---|---|---|
Use same yarn lot and machine settings | Makes sure all pieces look the same | N/A | Stops changes in the final product |
Size Set Checking | Checks samples in every size | Sampling | Keeps sizes and fits the same |
Inline Panel Check | Looks at random knitted panels | Quality Assurance | Finds problems early |
Final Panel Checking | Checks finished panels closely | Panel Checking | Stops bad panels from being used |
Final Quality Check | Looks at all garments before shipping | Quality Assurance | Last check before sending out |
Client or Third-Party Inspection | Outside person checks the sample | Client’s QA Representative | Final okay before shipping |
You always use the same yarn and machine settings for each sample. This keeps your knitwear the same every time. Quality control teams check the size, fit, and look of each piece. They also look at panels and finished clothes. Sometimes, a client or outside inspector checks the sample before you move on.
Handoff To Production
When your sample passes all checks, you give it to the production team. This step helps your design go from sample to full production. You need to follow steps to stop mistakes.
Here are the steps for a good handoff:
Make tech packs with all design details.
Pick the right materials for your knitwear.
Check the sample’s fit before making more.
Send samples to the sales team to look at.
Get orders from stores.
Place the order with the factory.
Approve each style before making it.
Give test reports for yarn quality.
Start knitting and give out care labels.
You should keep records at every step. This helps you watch your knitwear sampling process and fix problems fast.
Tip: Always check your tech packs and material lists before sending them to the factory. This helps you avoid big mistakes.
Preparing For Manufacturing
You need to get ready before you start making lots of knitwear. This part of the knitwear sampling process helps you keep quality high and stop delays. You must get your yarn and other materials ready for big orders.
Here is a table that shows the main steps for getting your knitwear ready for manufacturing:
Step | Description |
|---|---|
Yarn Preparation | Make sure the yarn has the right color, quality, and works well before knitting starts. |
Yarn Procurement | Buy yarn that matches what the customer wants, including color and amount. |
Smoothing & Conditioning | Use a machine to get the yarn smooth and ready, so it does not break. |
Quality Check | Technicians check the yarn for strength, smoothness, and evenness before making lots of pieces. |
You need to check that your yarn matches your sample in color and quality. Technicians smooth and get the yarn ready so it does not break. Quality control teams check the yarn before you start making lots of knitwear. These steps help you keep your knitwear looking good and make sure every piece matches your approved sample.
By following these steps, you move from the knitwear sampling process to making lots of knitwear with confidence. Good planning and strong quality checks help you make knitwear that meets your standards and your clients’ needs.
You begin the knitwear sampling process with swatching. This step helps you catch errors early and makes sure your knitwear fits well. You follow each process step to create a strong sample. Good communication with your sample knitter improves results and builds trust. Pay close attention to details like trimming loose ends and checking seams. Use tools such as a sample washer and hydro sprinkler station to fix common sample issues. Always inspect your knitwear for flaws before moving to production. Careful work at every stage leads to a high-quality sample and a successful knitwear sampling process.
Skilled workers check each sample by hand, looking for even the smallest flaws. This careful inspection helps your knitwear stand out.
Process | Description |
|---|---|
Inspecting and Trimming Loose Ends | You trim threads and ends to keep your knitwear free from imperfections. |
Final Touch-ups and Detailing | You add final touches to improve the look and fit of your sample before approval. |
FAQ
What is a knitwear sample?
A knitwear sample is a test piece you create before making the final garment. You use it to check fit, texture, and design. This step helps you avoid mistakes and improve quality.
Why do you need to swatch before knitting a sample?
Swatching lets you see how your yarn and pattern work together. You measure gauge and check texture. This step helps you make sure your sample will fit and look right.
How do you choose the right yarn for sampling?
You look at fiber type, yarn weight, and texture. You match the yarn to your design needs. Testing different yarns helps you find the best one for your sample.
What should you do if your sample does not fit?
You review your measurements and pattern. You make changes to the size or shape. You may need to re-knit parts of the sample. Careful checking helps you fix fit problems.
How do you communicate with your sample knitter?
You share clear instructions and updates. You ask for photos and feedback. Good communication helps you catch mistakes early and keep your project on track.
What is blocking, and why is it important?
Blocking means washing and shaping your knitwear sample. You let it dry in the right shape. This step helps your sample look smooth and fit well.
How do you check the quality of your knitwear sample?
You inspect the sample for loose ends, even stitches, and correct measurements. You use a checklist to make sure every part meets your standards.
When is your sample ready for production?
Your sample is ready when it fits well, looks good, and passes all quality checks. You update your pattern and get approval before starting full production.